

Kanban for Everyone.
Creating a custom digital Kanban board that everyone can use.


Creating a custom Kanban Workflow.
We’re going to be creating a digital Kanban board. This will give us a clear way to handle many different scenarios throughout the workday, or even at home if you want. We aren’t going to adhere to any strict guidelines when creating our Kanban board. Perfection should not get in the way of progress. While we will be building this for my teams needs, feel free to change it up for your needs. See something you think could be done better? Leave a comment with your suggestion or idea.
What is Kanban?
Kanban is a guide or framework used to organize and manage tasks visually. We are using Kanban in the context of software development, But it can be applied to many applications.
Why use Kanban?
While it may seem complicated at first, Using Kanban really brings order to things. No matter how hard you or your team is working, you won't get far if you aren't working toward the same goals. That may seem vague, but it's true.
For example, before Kanban one of us might write up a Github issue, then a developer would look at the ticket, try to figure out what the issue was, then decide the best way to solve it, and implement that solution. That doesn't sound so bad. At least not until we have our next meeting and realize that's not the best fix, or that one of us doesn't agree with the fix. That's time wasted that could of easily been avoided.
Digital Kanban is especially great for remote teams, giving everyone the ability to see the status and condition of cards regardless of their time zone.
Creating our Kanban board.
My teams needs.
My team consists of about 4 people, only 2 of which being developers. We’re a small startup with a b2b SaaS product. All 4 of us are heavily involved in the design, development, and implementation process. We use GitHub for our version control and issue tracking. GitHub has a project feature which has a Kanban board view, which is what we’ll be using in this guide. This helps us link our issues, pull requests, commits, all in the project easily. You don’t have to use the same program to follow along with most of this article, just skip the next section if you want to use your own. But keep in mind if you skip the next section, you'll miss a few bits of information on how our team handles certain situations.
Before we get started.
I just want to say again, this is not a rulebook for Kanban. I looked at some examples of how other teams implemented Kanban, Some were very strict, some were extremely laid back. Some had less status columns some had way more. Some people won't like the way we've implemented Kanban, Others will think it's great. We have changed our board and cards multiple times, Do whatever works best for your team. Anyways, let's jump into creating our Kanban board.
Creating our project board.
First we’ll start of by navigating to our Github profile. You should see a Projects tab, click it. Then click New project. You'll be asked to select a template, Select Board.
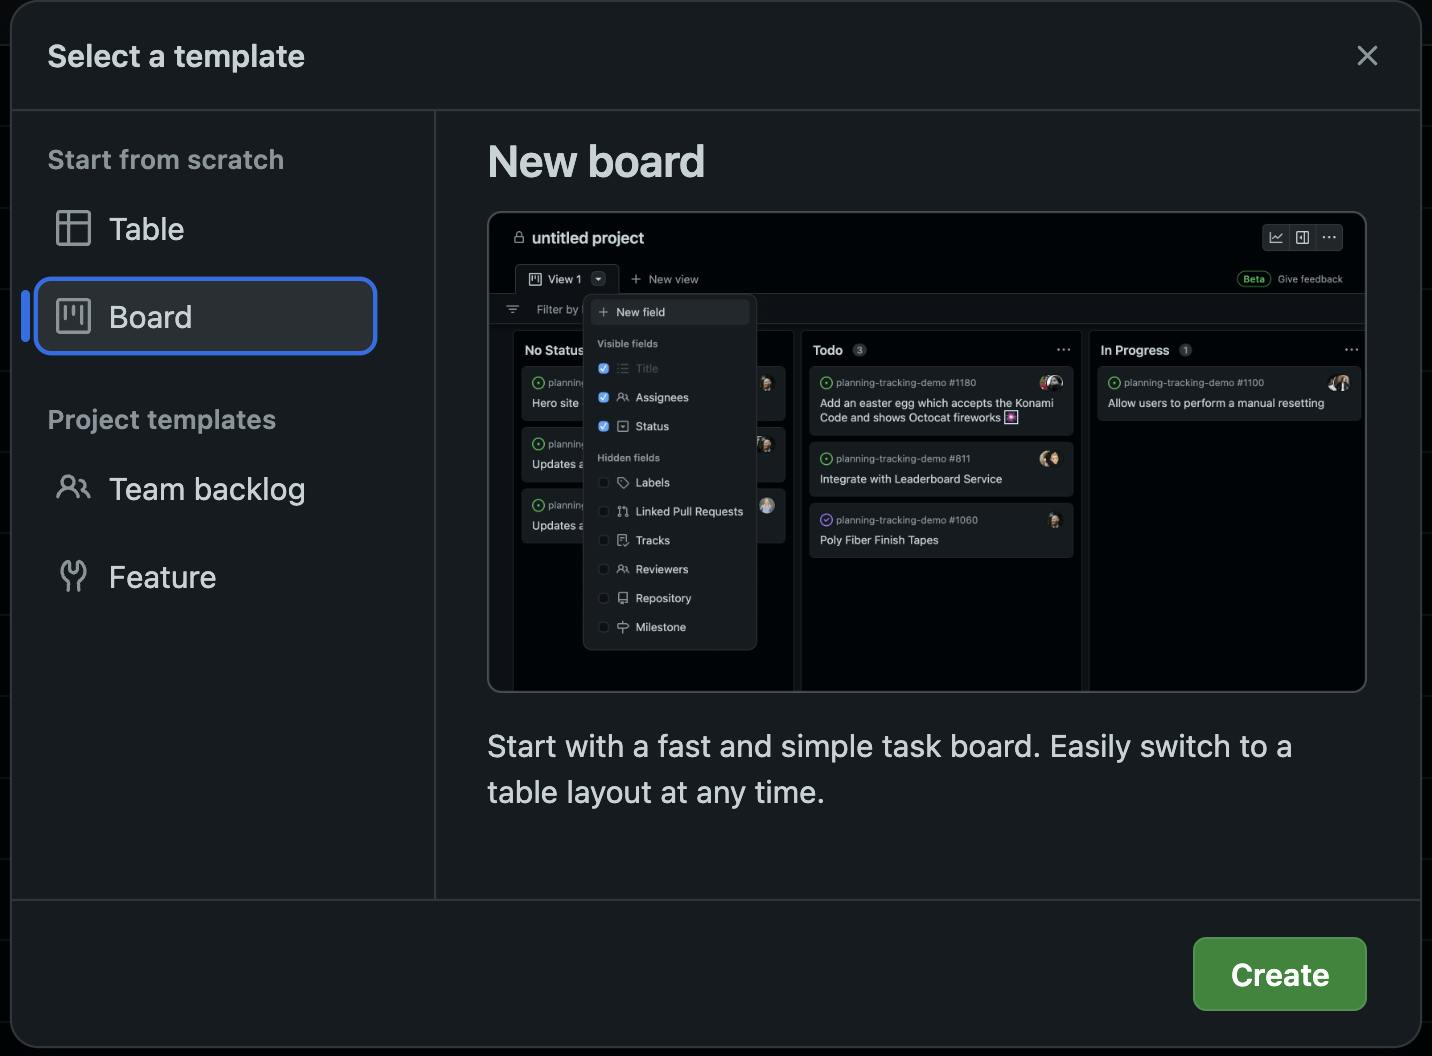 Now click "Create".
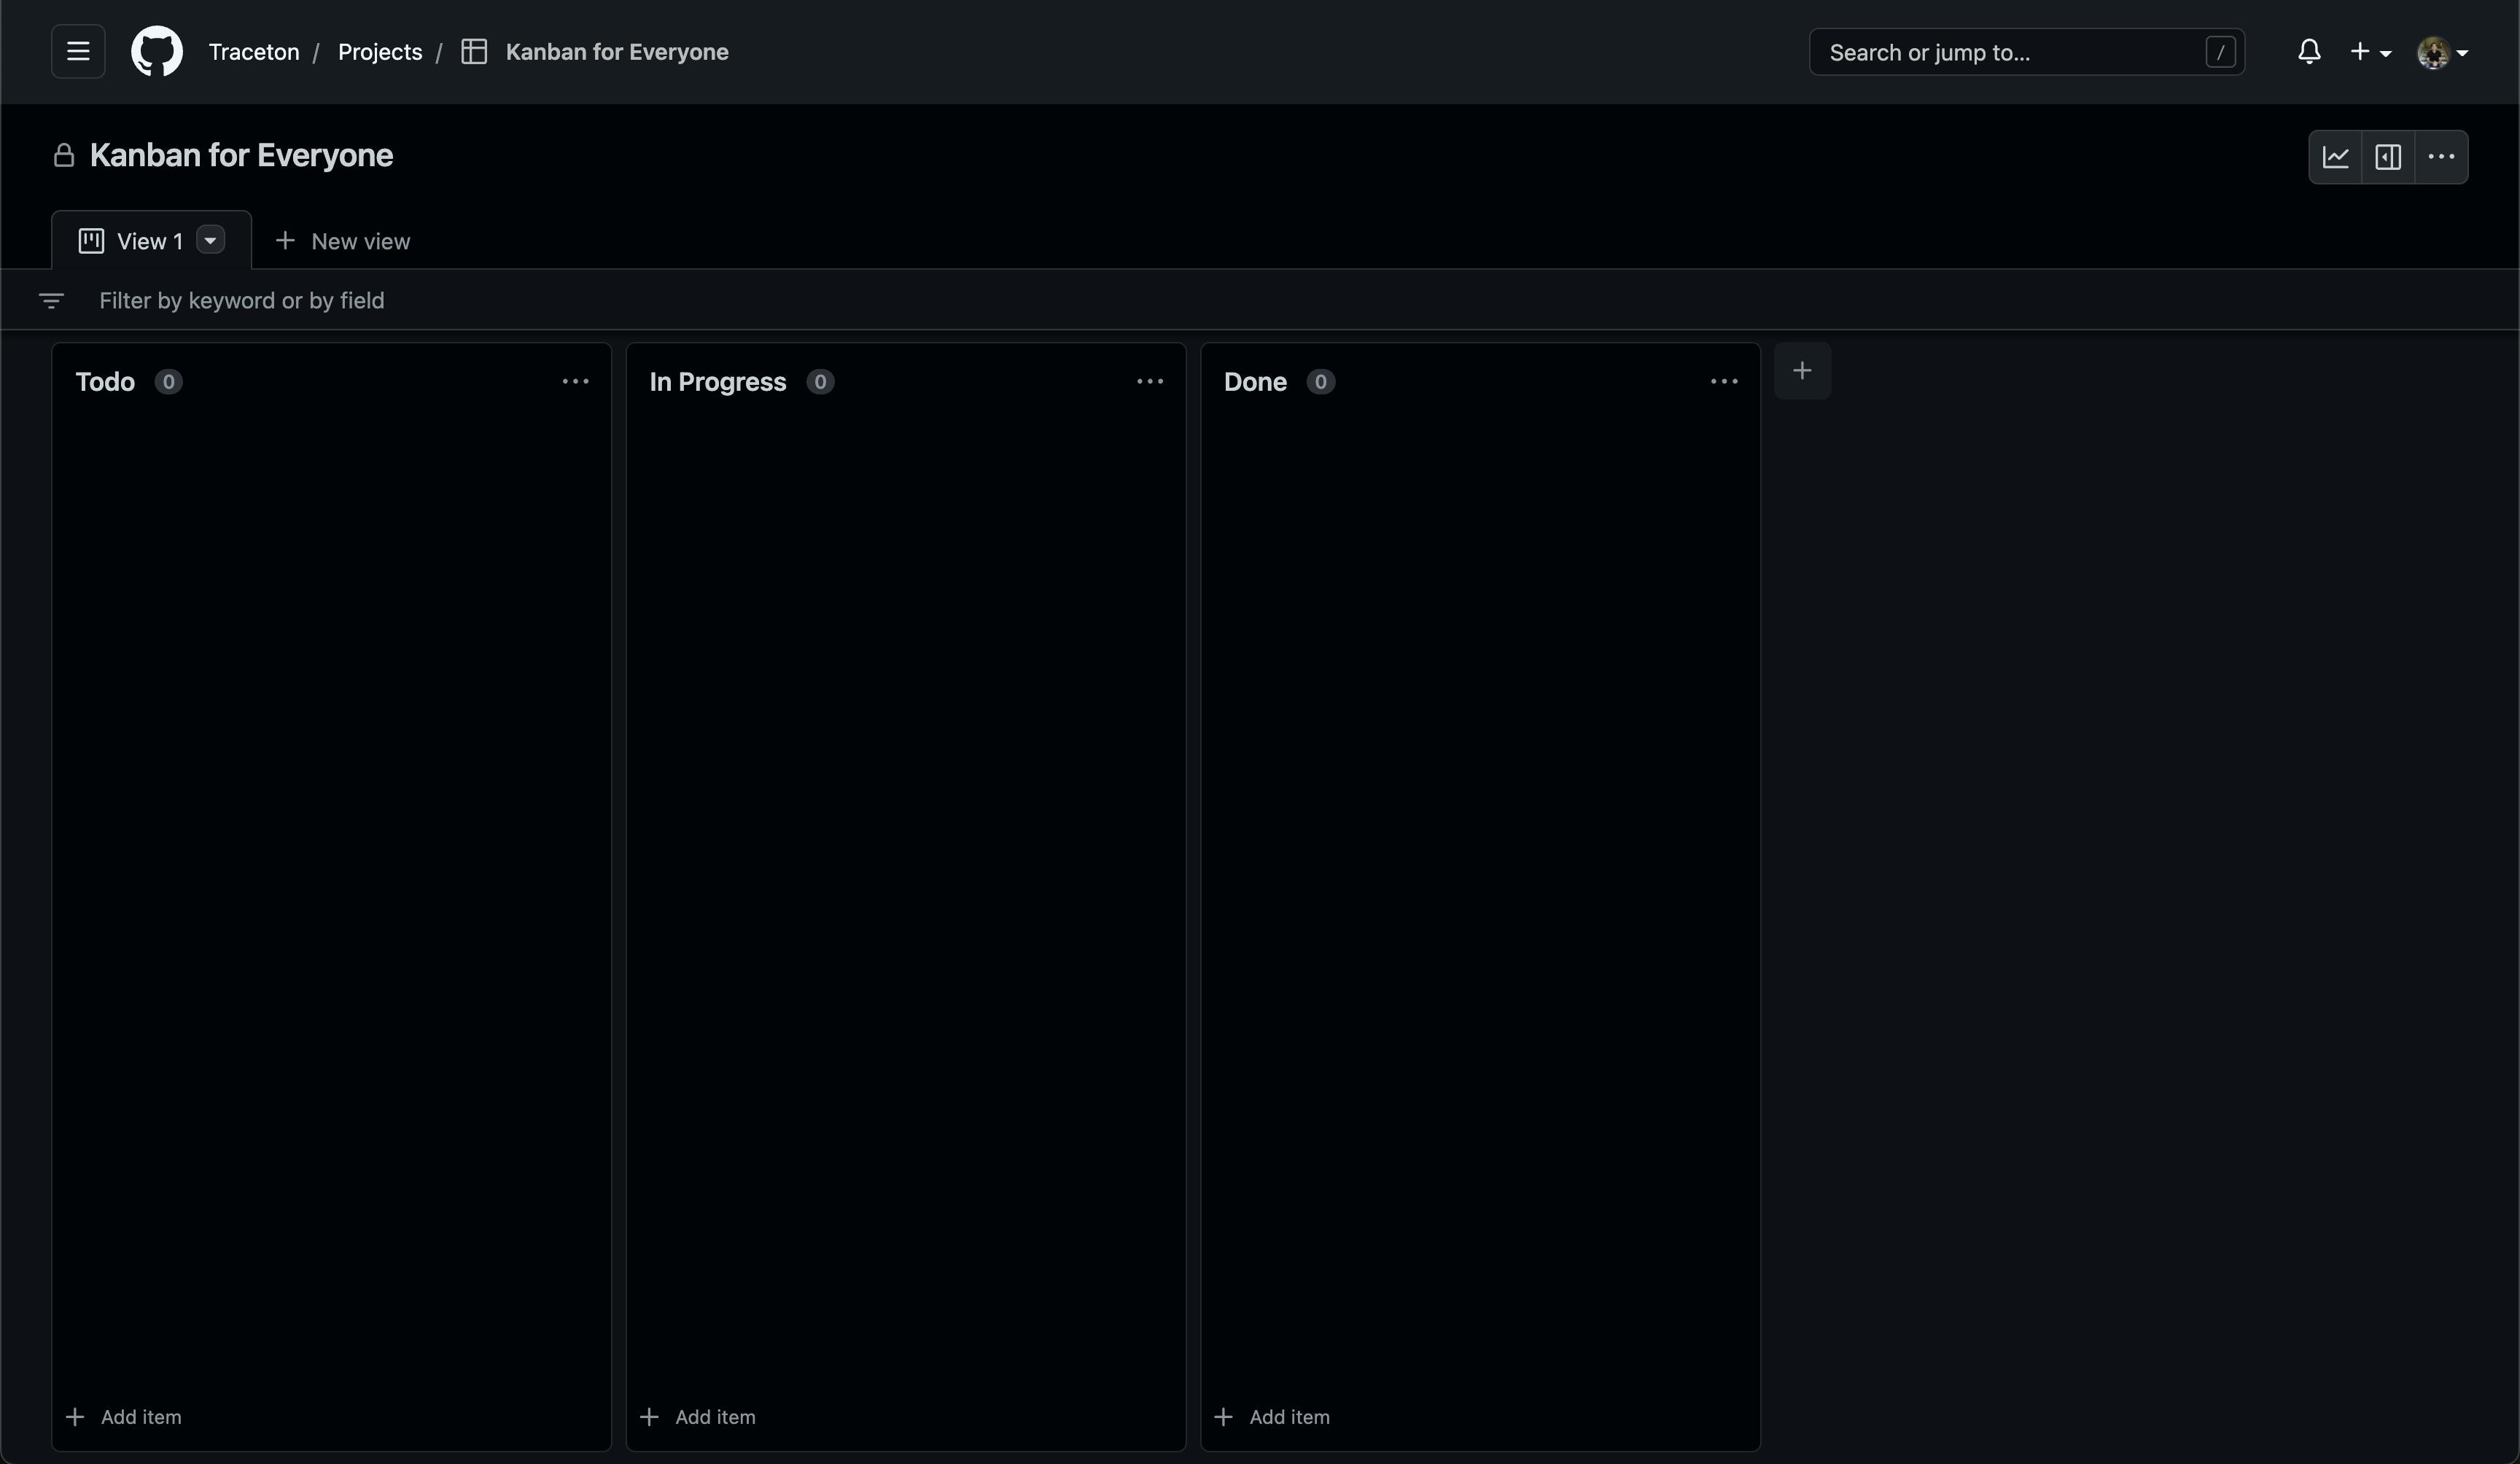
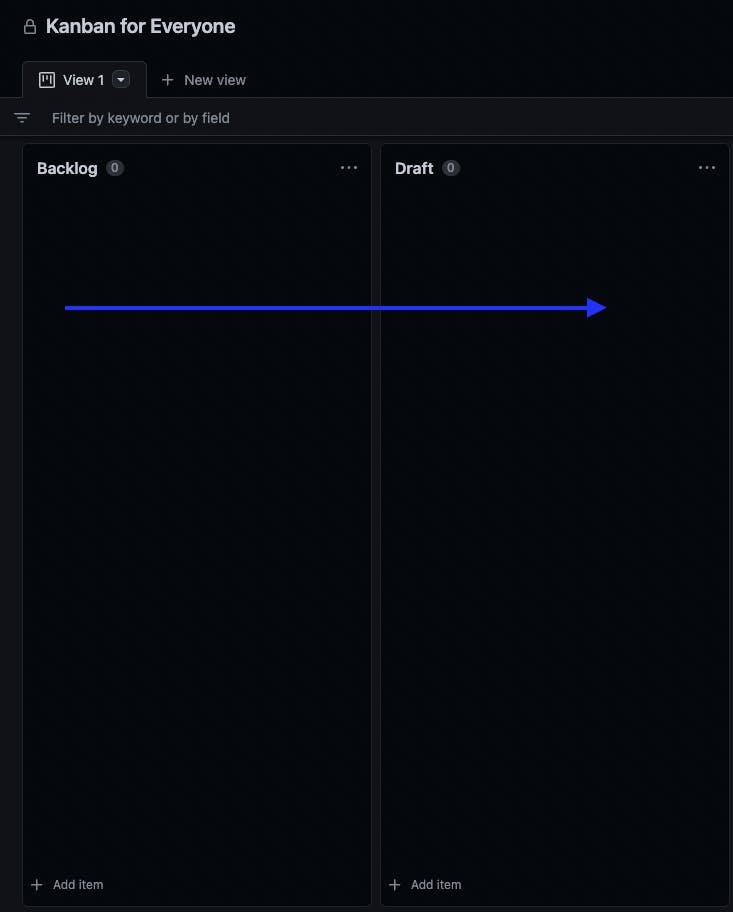
You should now have the basic makings of a Kanban board. Ignore the status columns it gives as a default, we'll be changing these.
Creating our card properties.
We're going to create our card properties first. We'll need these to help us understand what's going on when we create our status columns.
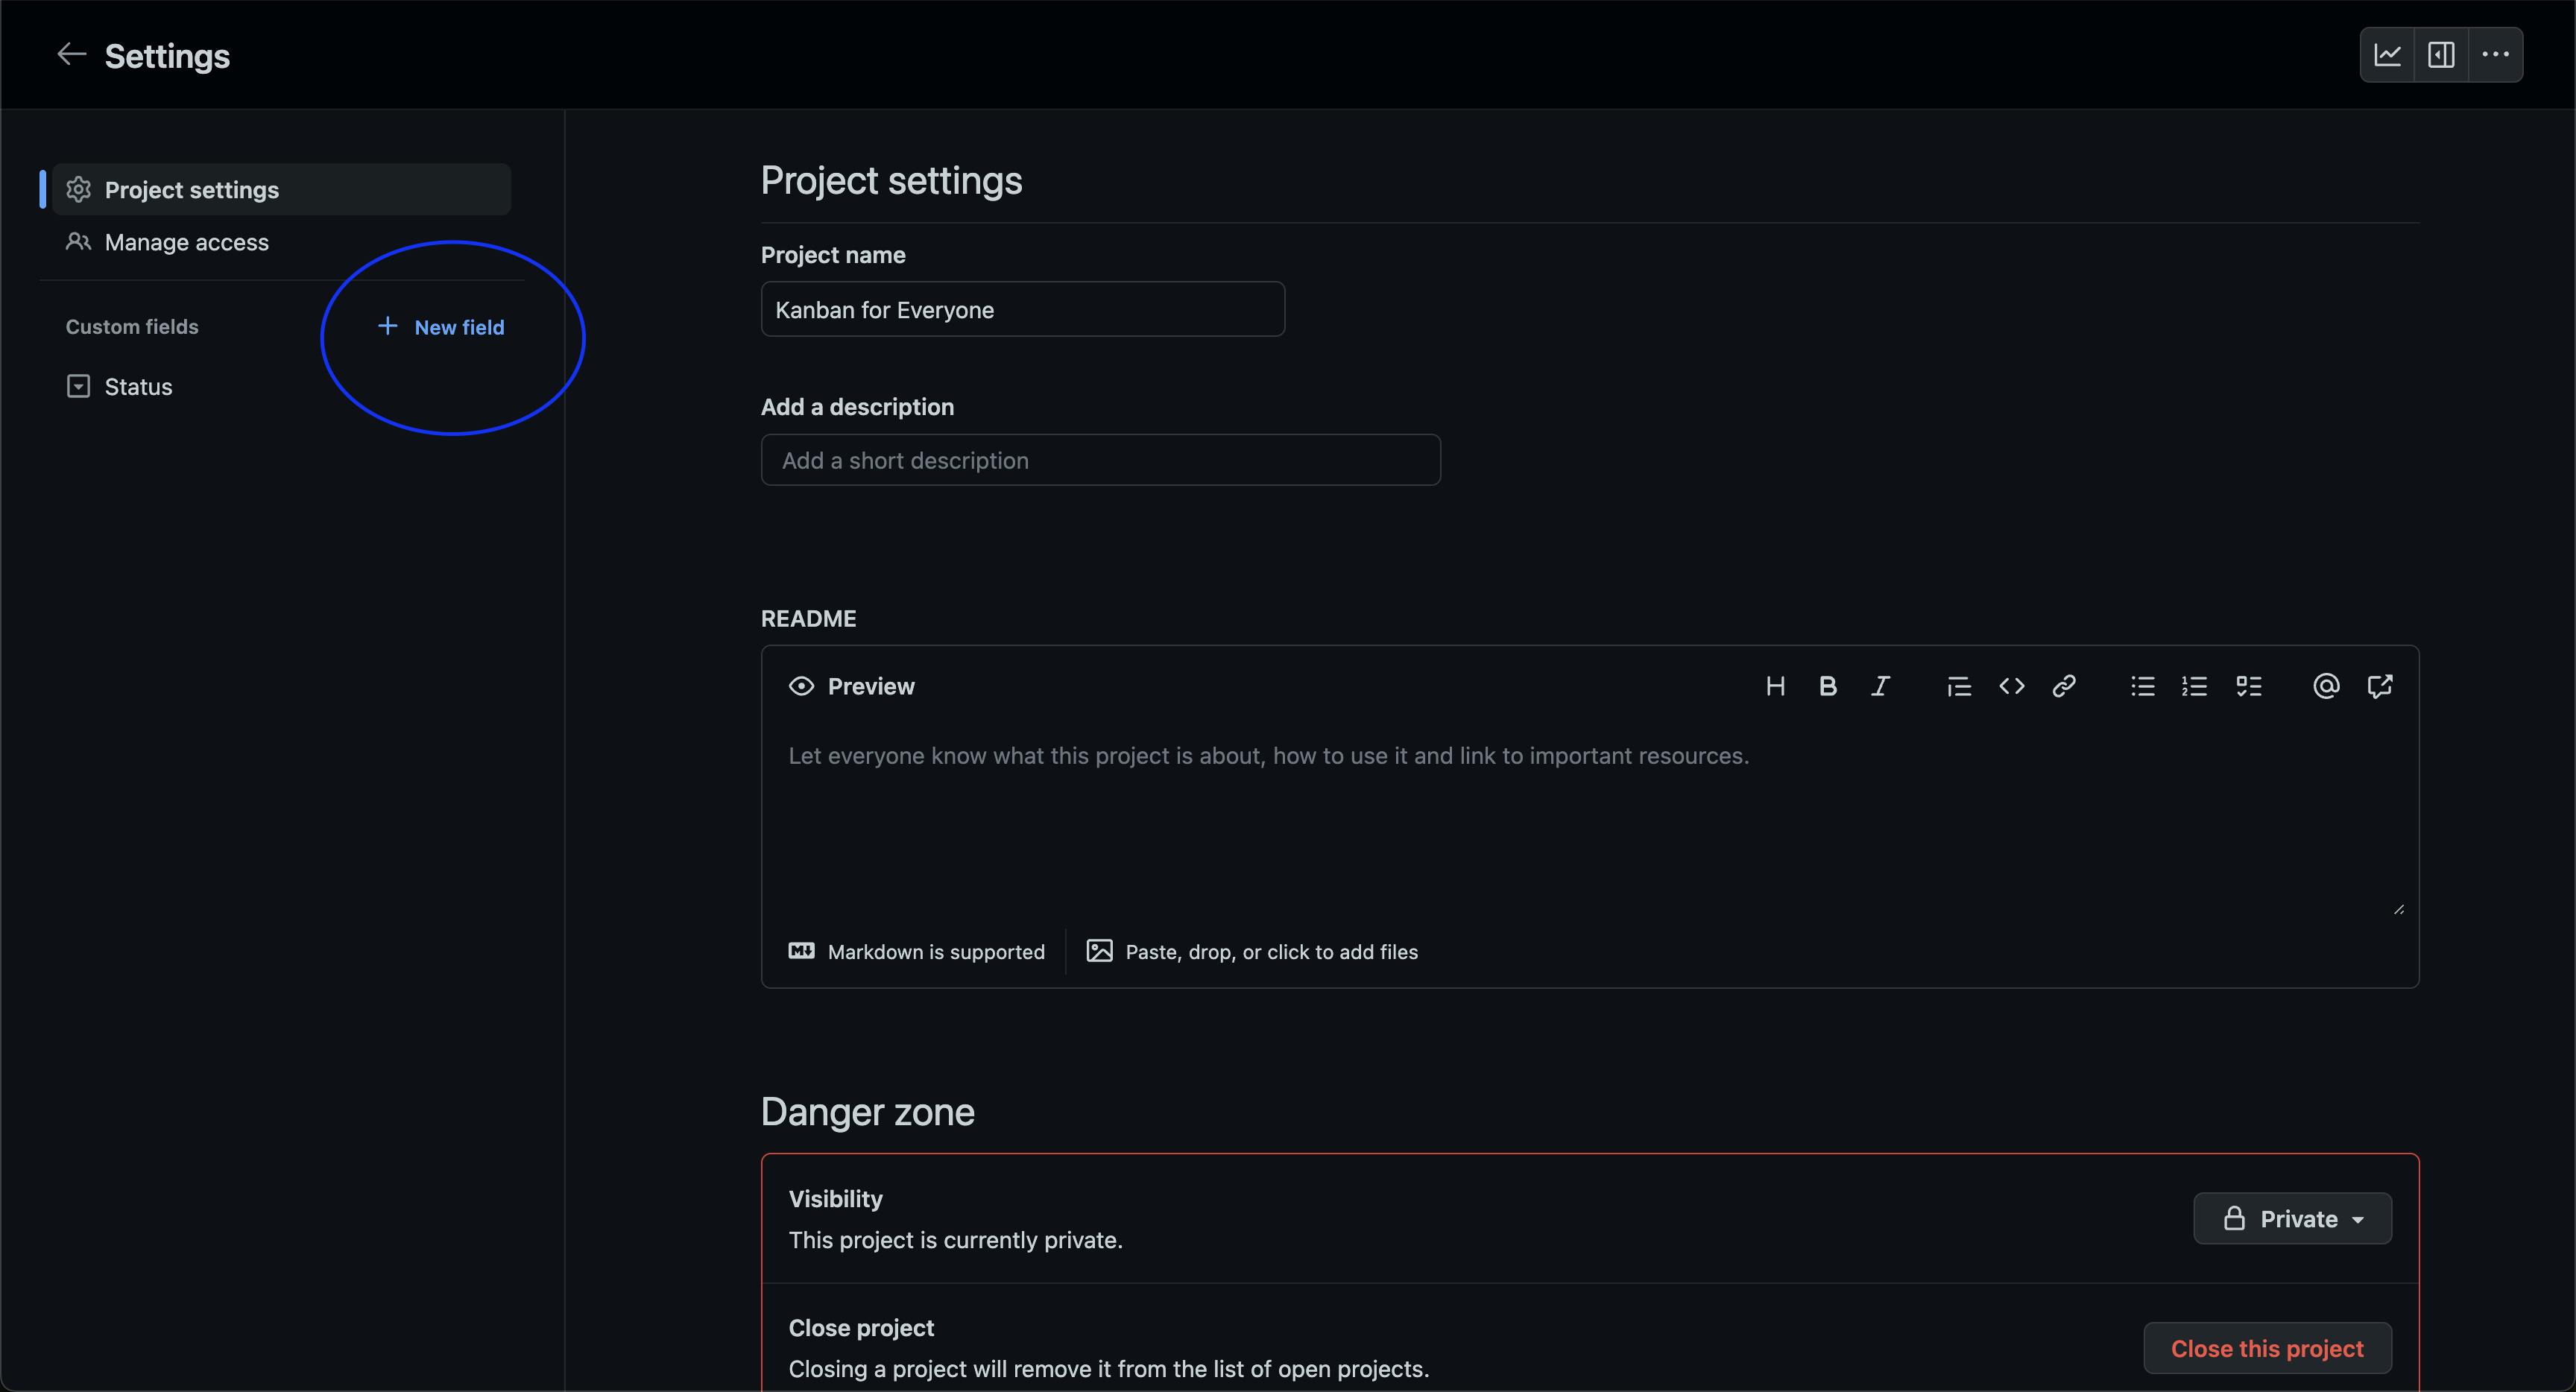
First, navigate to settings.
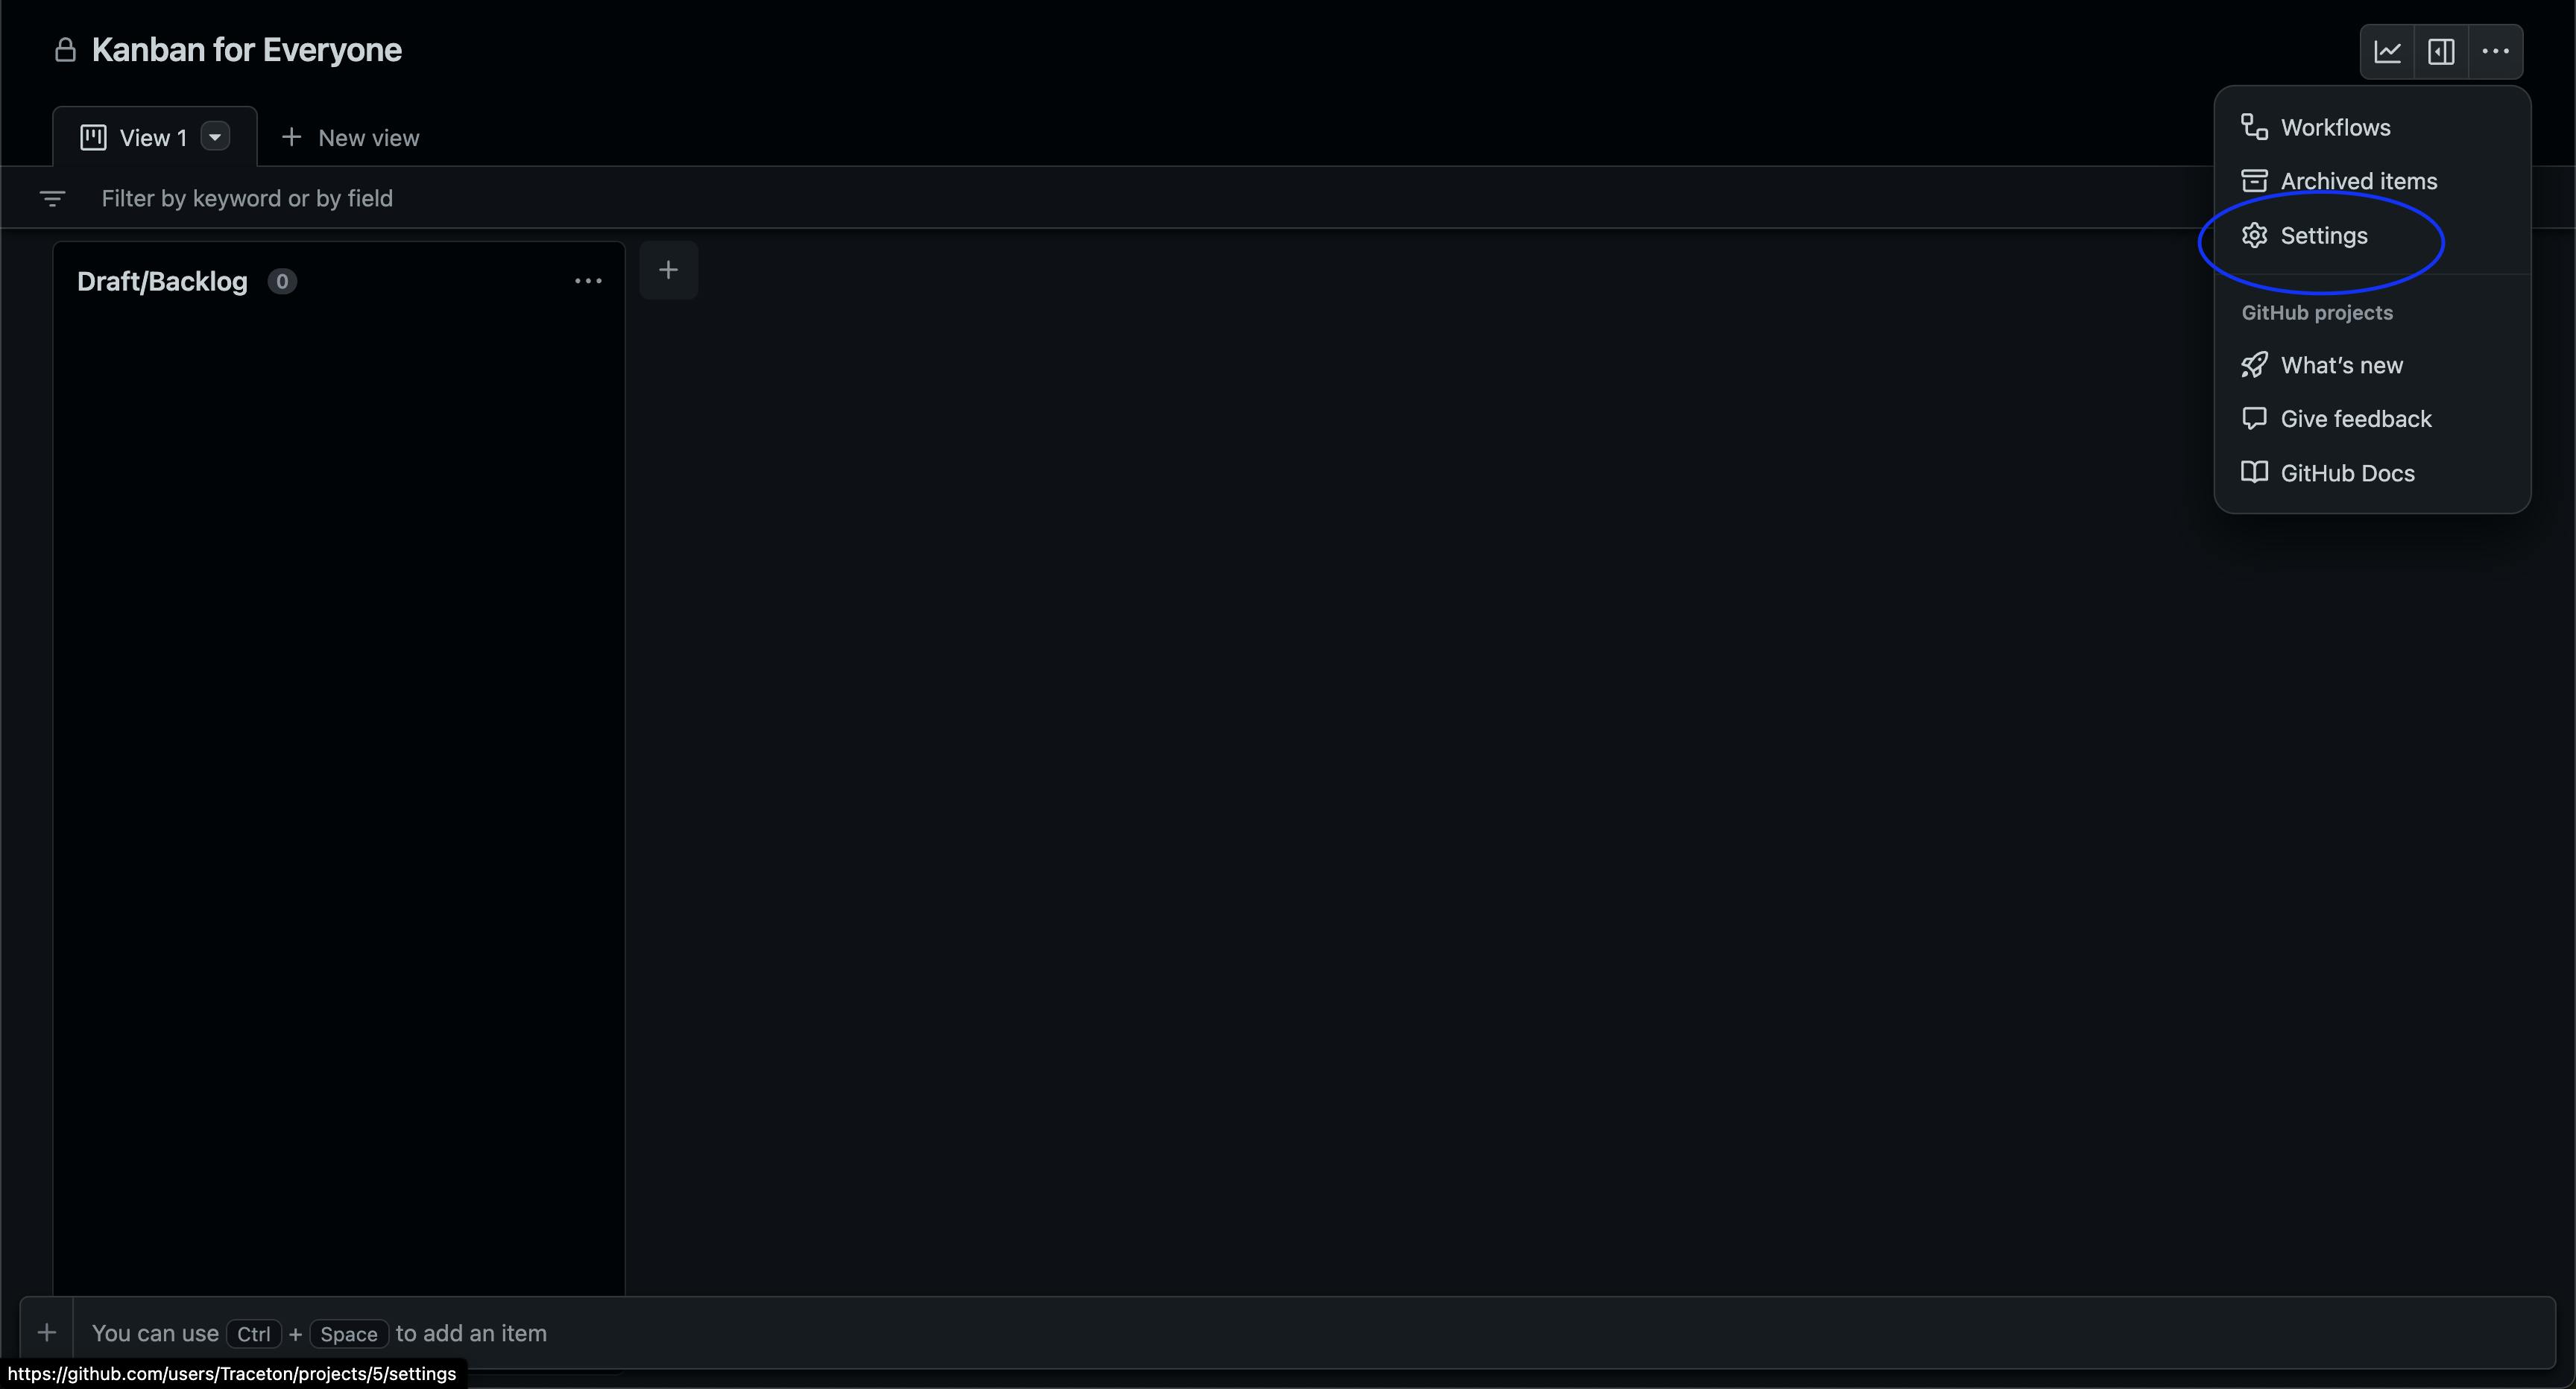
We're going to be adding new fields here.
Priority.
Priority is something that sounds easy, but can be way over-complicated. We only have 2 different priorities.
- Standard
- Expedite/Emergency
Notice the icons, I like to use a green checkmark next to things that are positive. I like a red exclamation for things that require attention
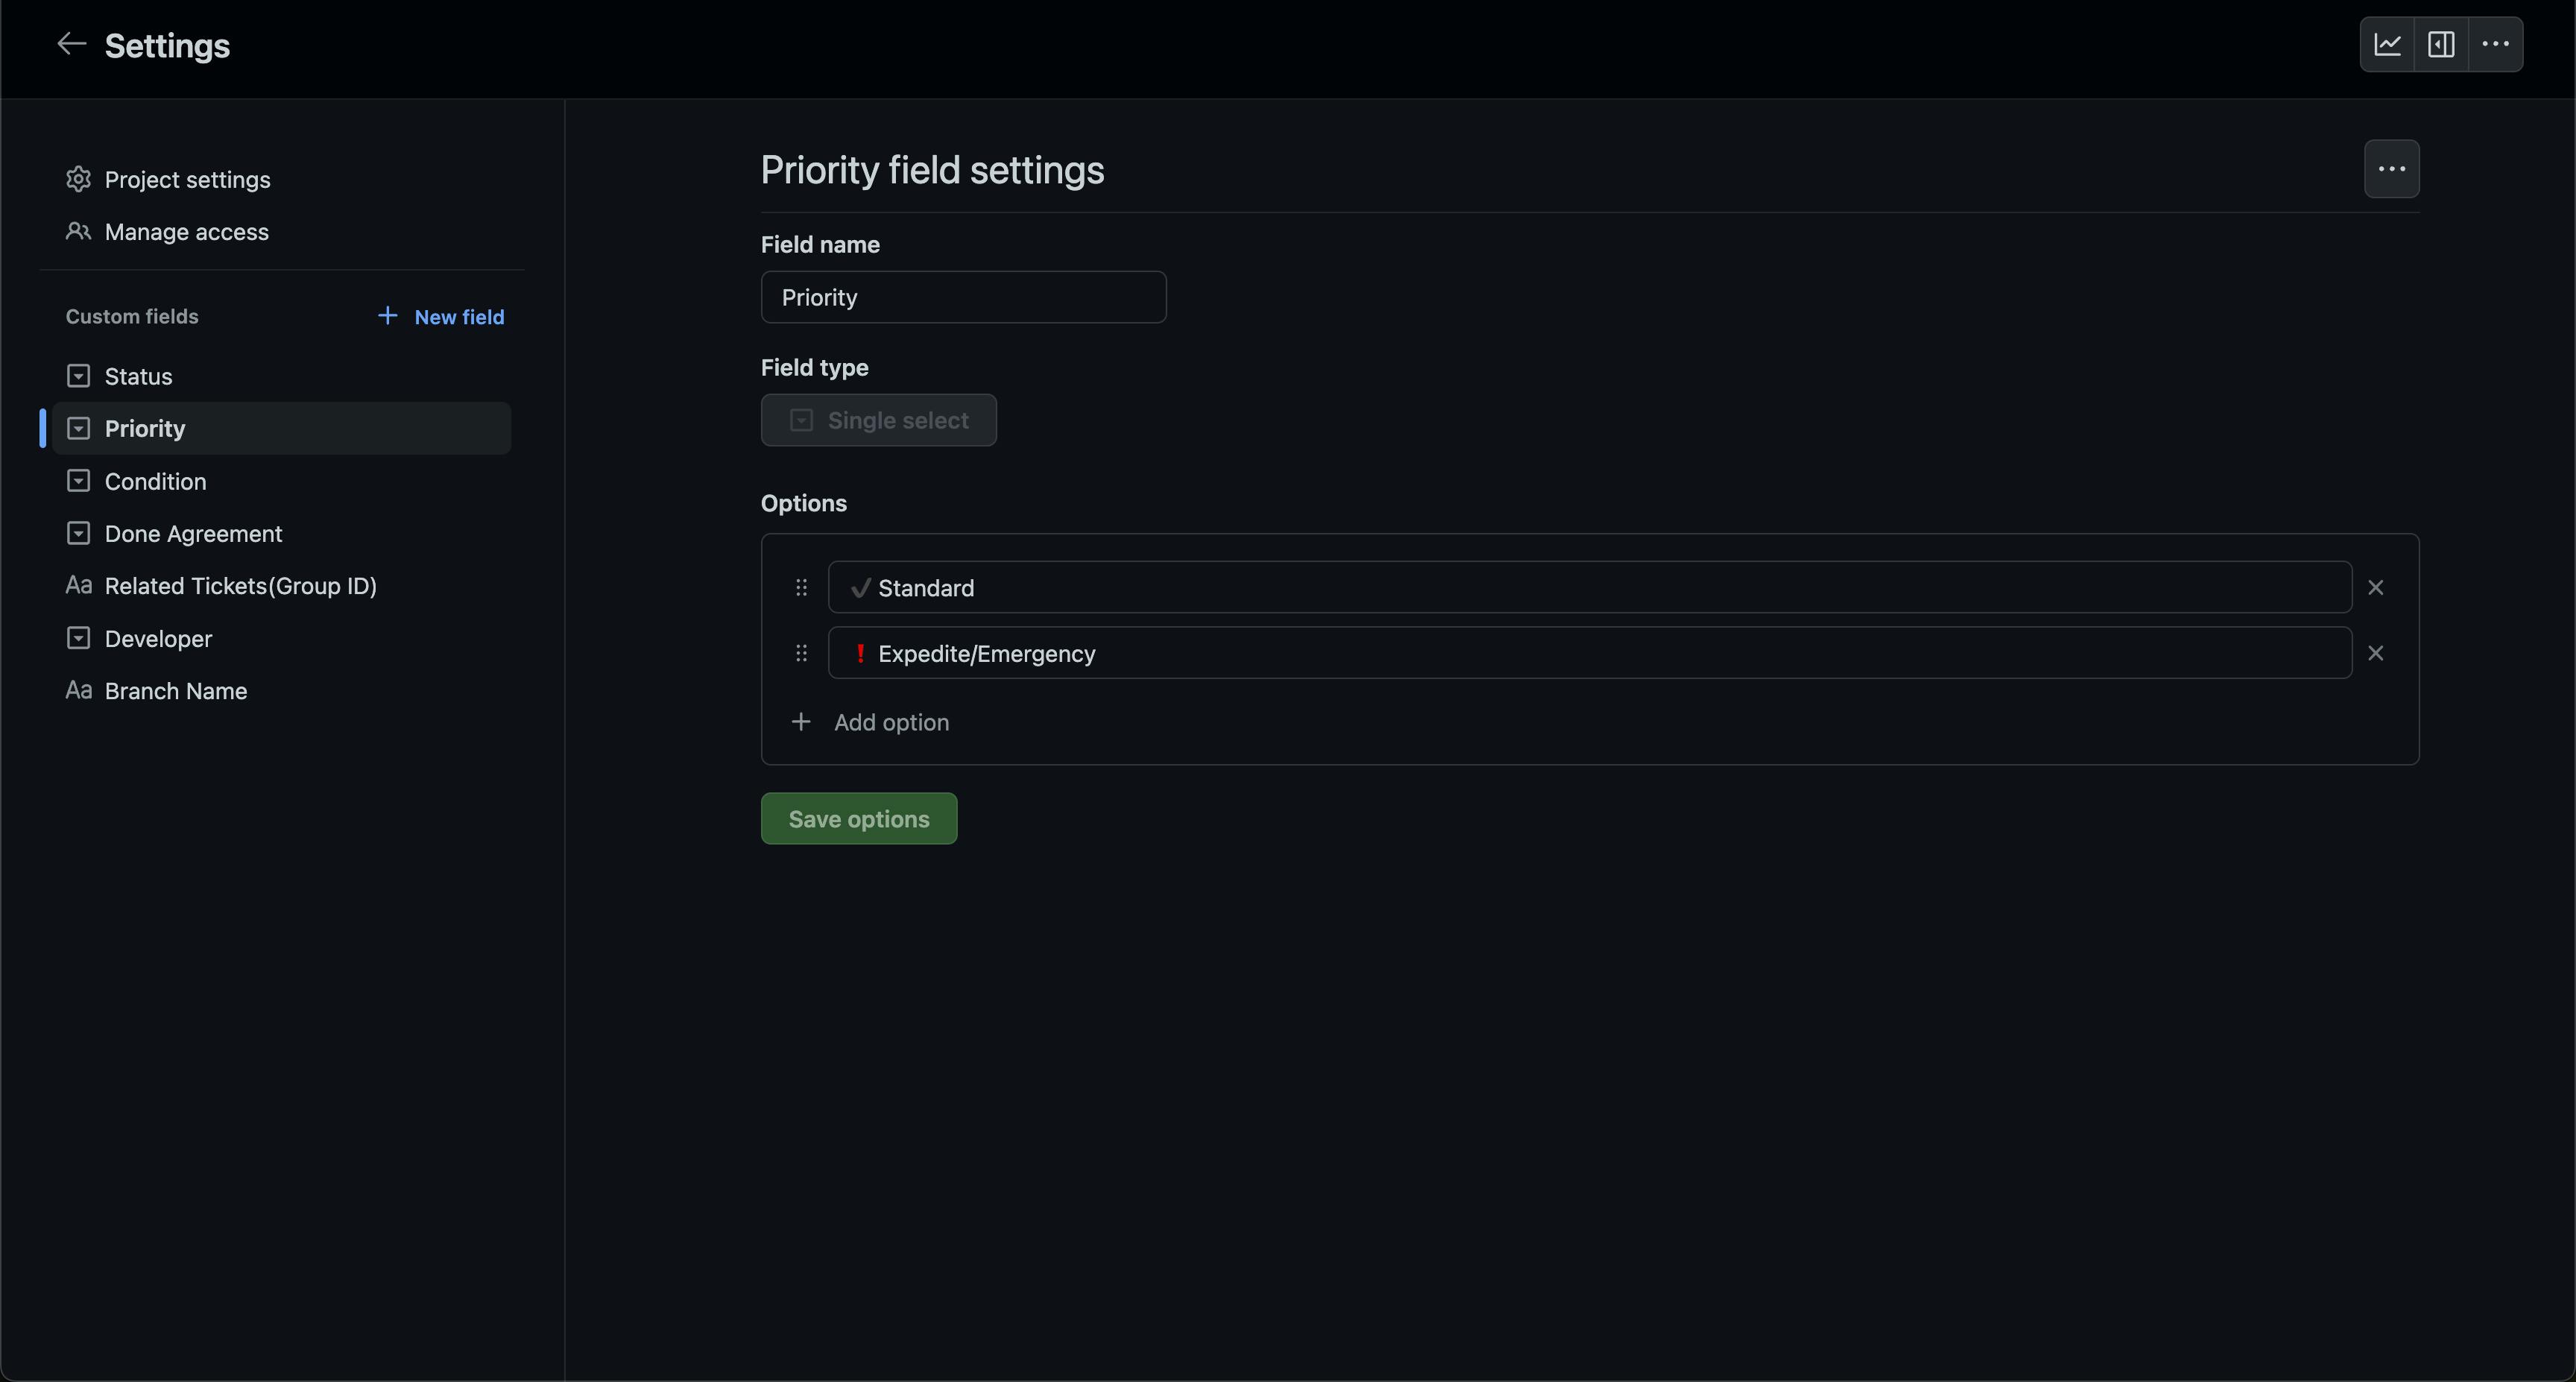
We did this to remove the extra fluff of trying to determine a perfect order for cards to be completed. Plus, that's not exactly what we use priority for. Basically we just set the priority as Expedite/Emergency if it'a an actual emergency. Otherwise, we're just going to work on cards in the order they are listed in the board(Top/most important -> bottom/least important). Mon-Thu we have a morning standup where we look at the Kanban board together, We then place cards in the order we agree they should be in.
Condition.
We use condition as a way to easily display what's going on with a certain card. We settled on 3 different conditions.
- All Good(This card is moving along as it should, nothing irregular.)
- Question(Someone has left a question on this card that needs an answer. This question doesn't require a meeting for an answer.)
- Needs Discussion(Team discussion is needed. Cards with this condition become our main talking point for morning meetings.)
Notice the icons again

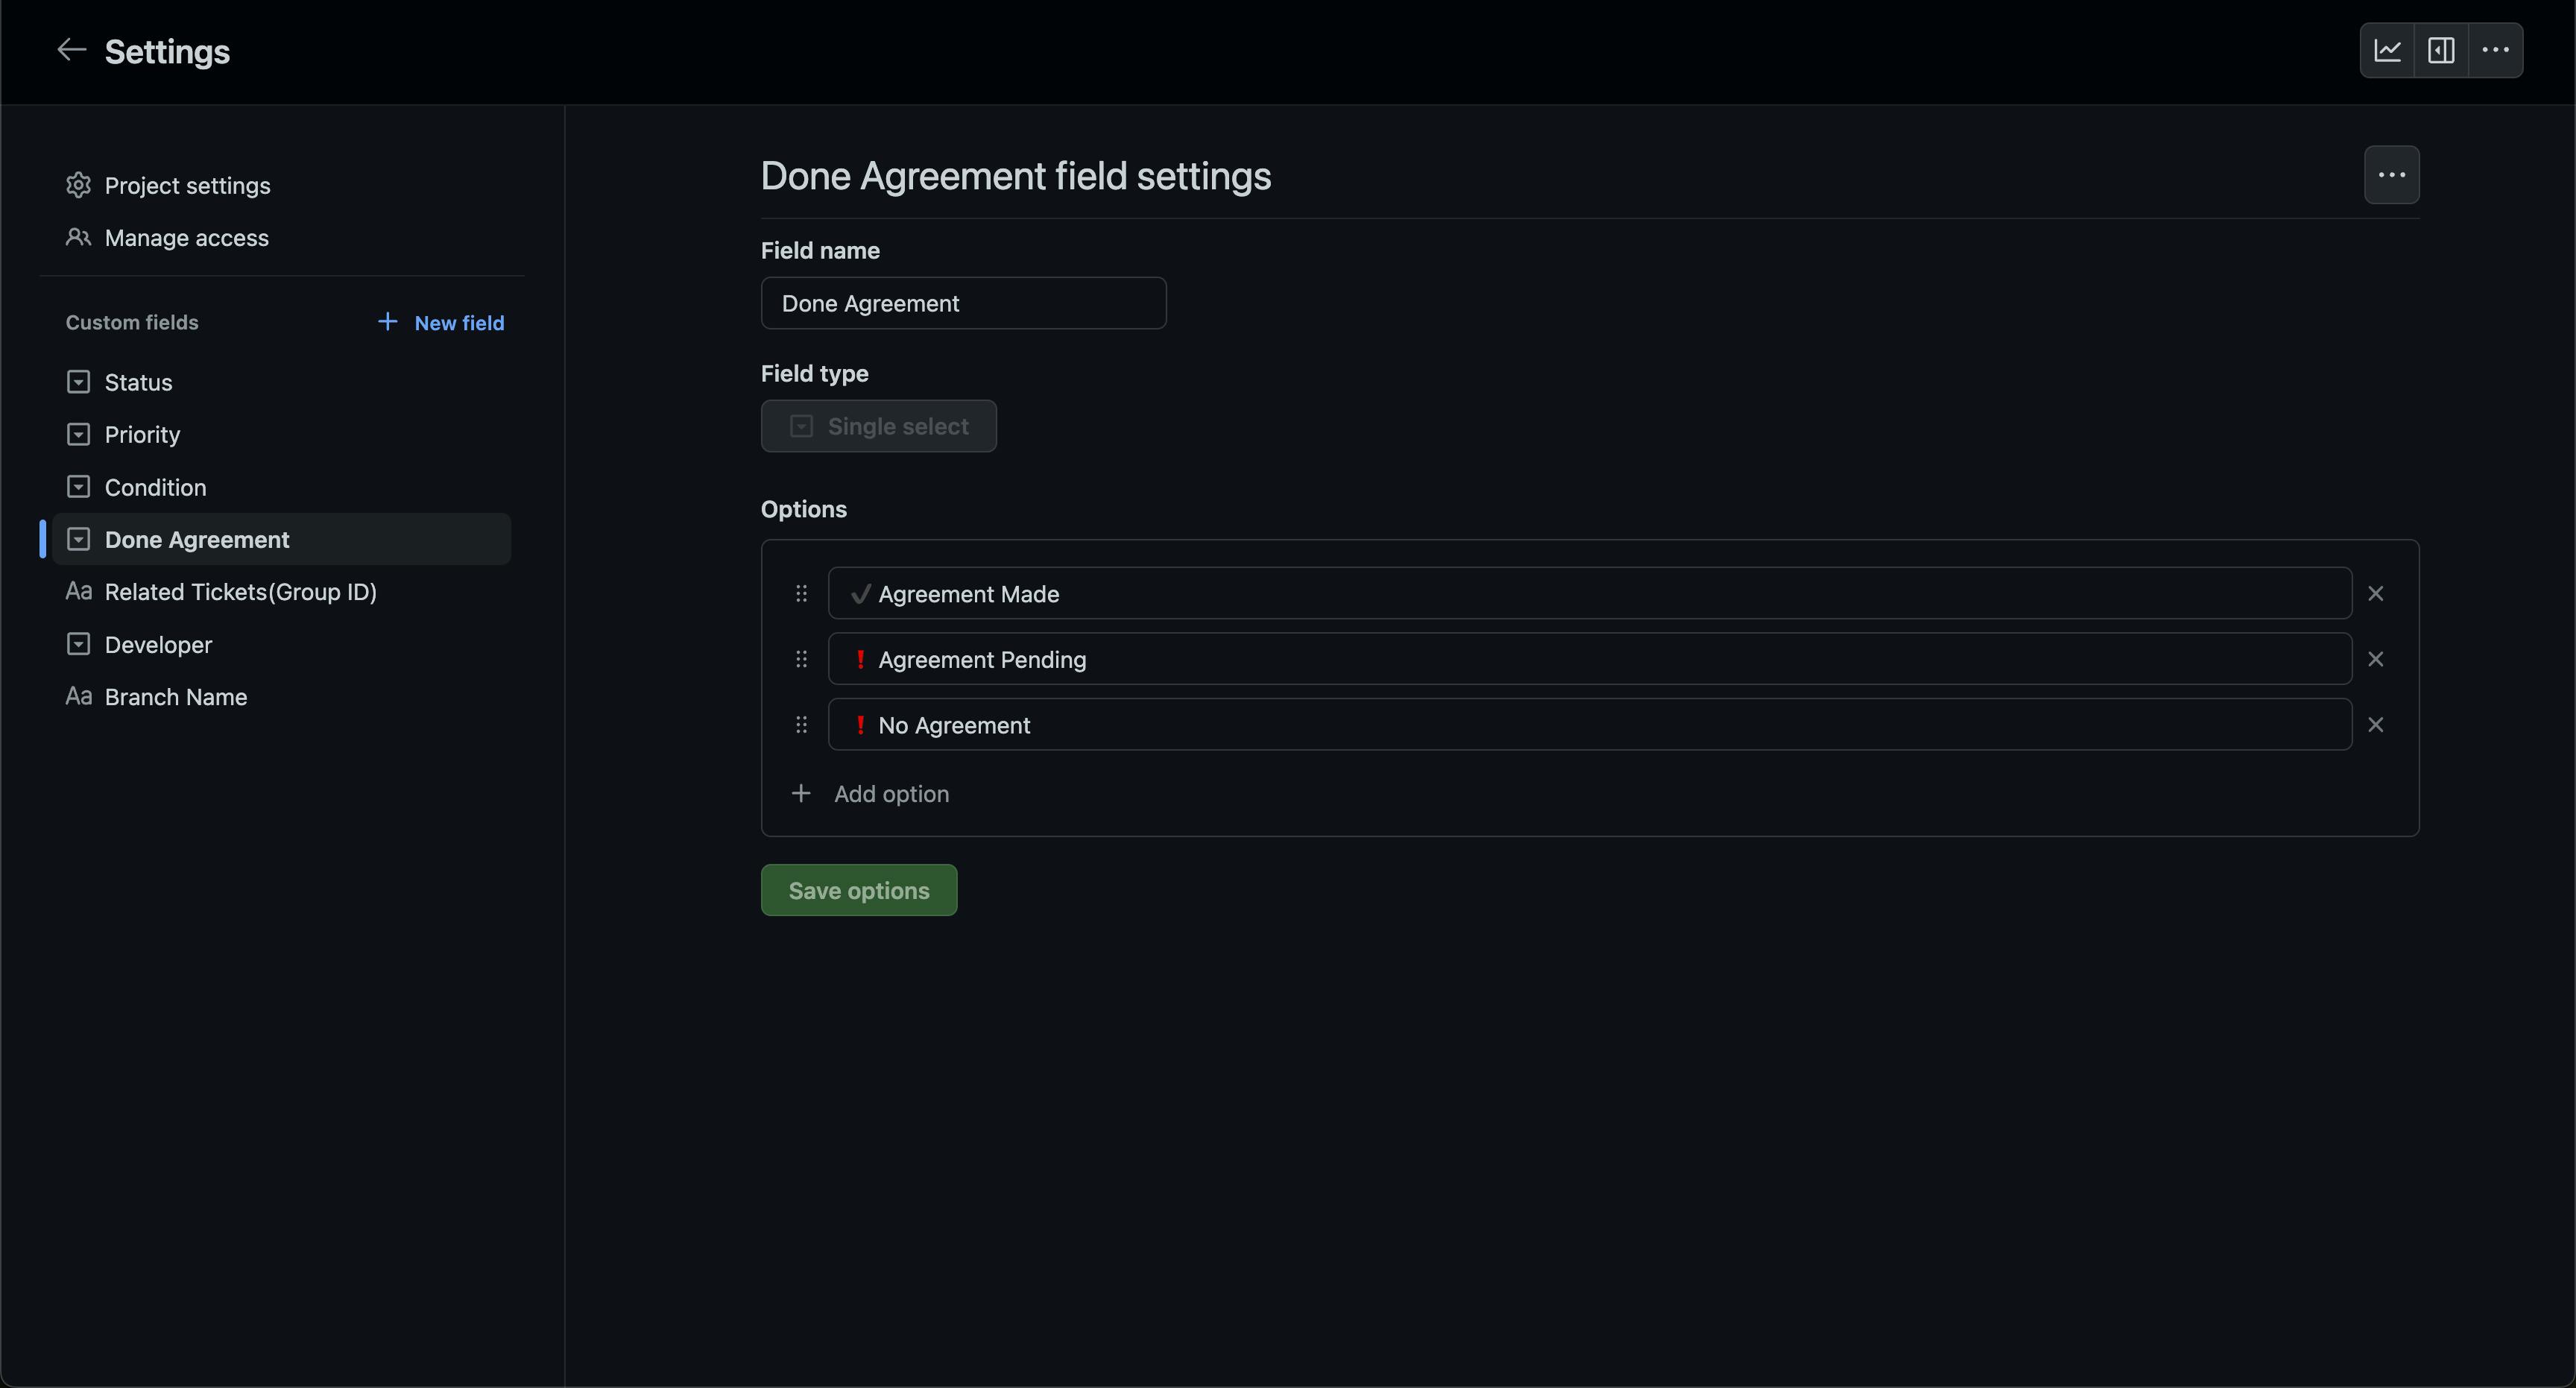
Done Agreement.
We use this property to quickly display the current state of the cards "Done Agreement". For our team, The done agreement needs to contain the final requirements of the card. We also want at least 2 of us to sign off on the final requirements before the card is worked on. We landed on these 3 Done Agreement options.
- Agreement Made(At least 2 of our team members have signed off on the done agreement)
- Agreement Pending(The done agreement has been written, but not enough people have signed off on it.)
- No Agreement(The done agreement hasn't been written yet.)
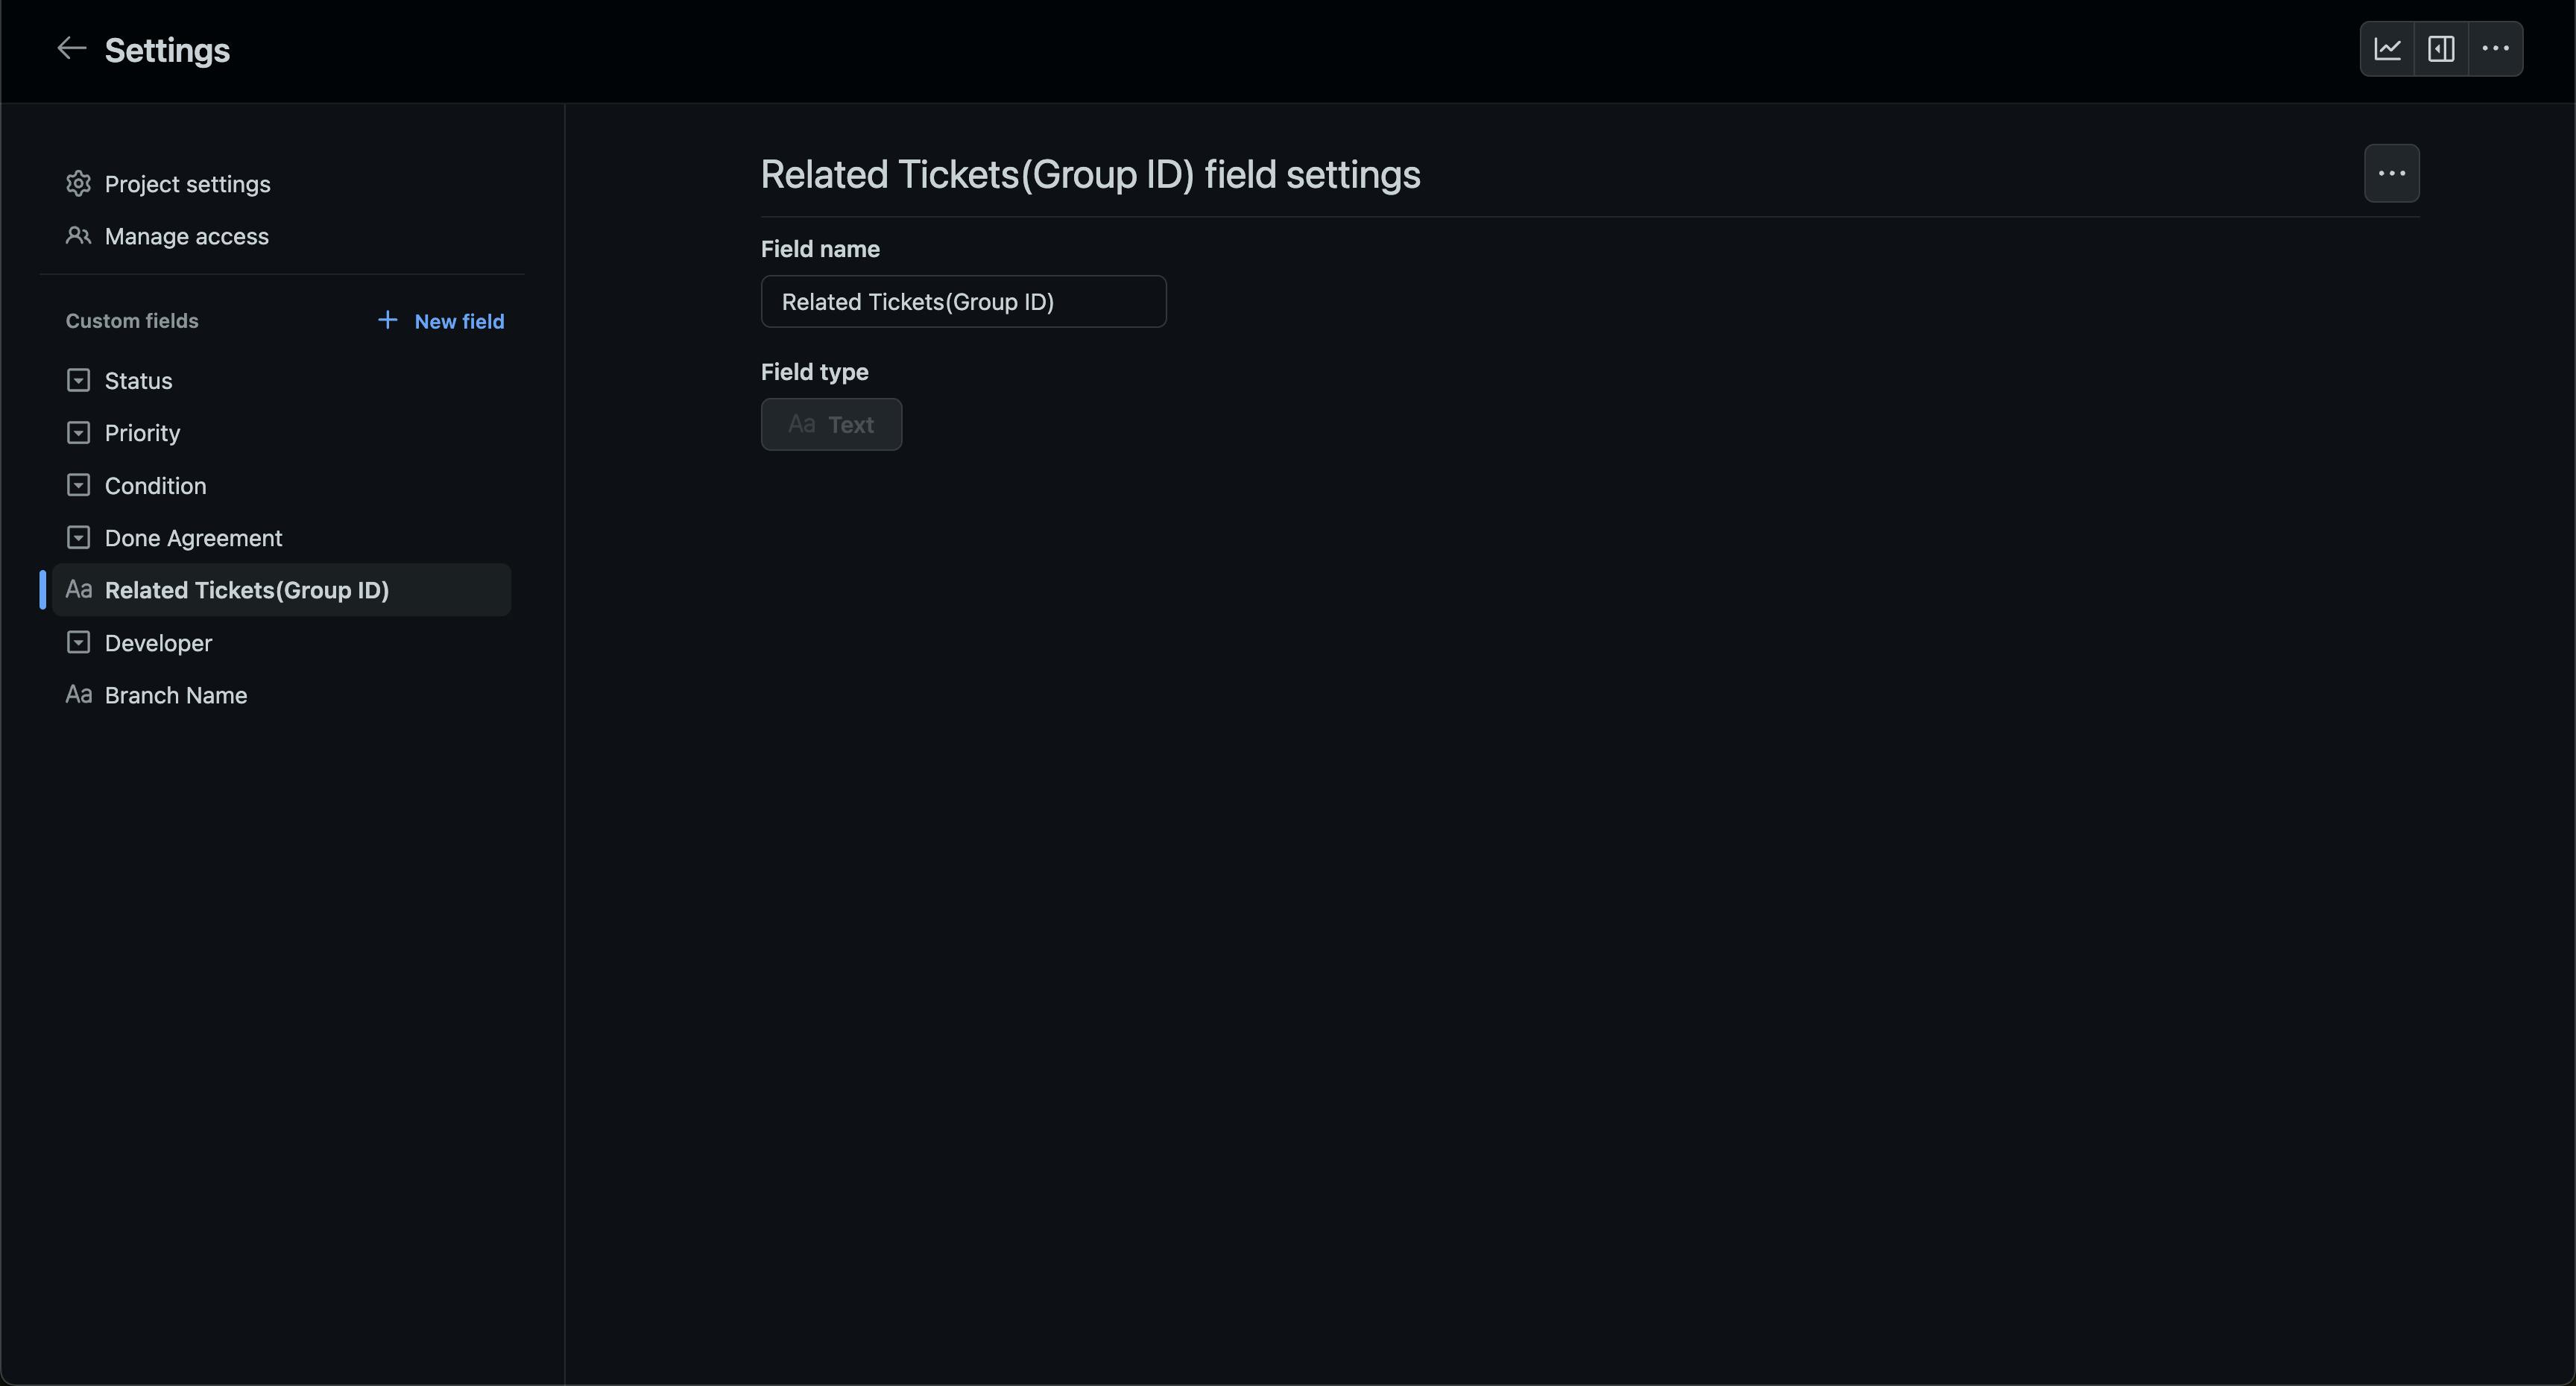
Related Tickets(Group ID).
Related Tickets is just a simple text field. If we have 2 different cards related to the Header of our app, we'll use something like "Header Group 1" on both cards.
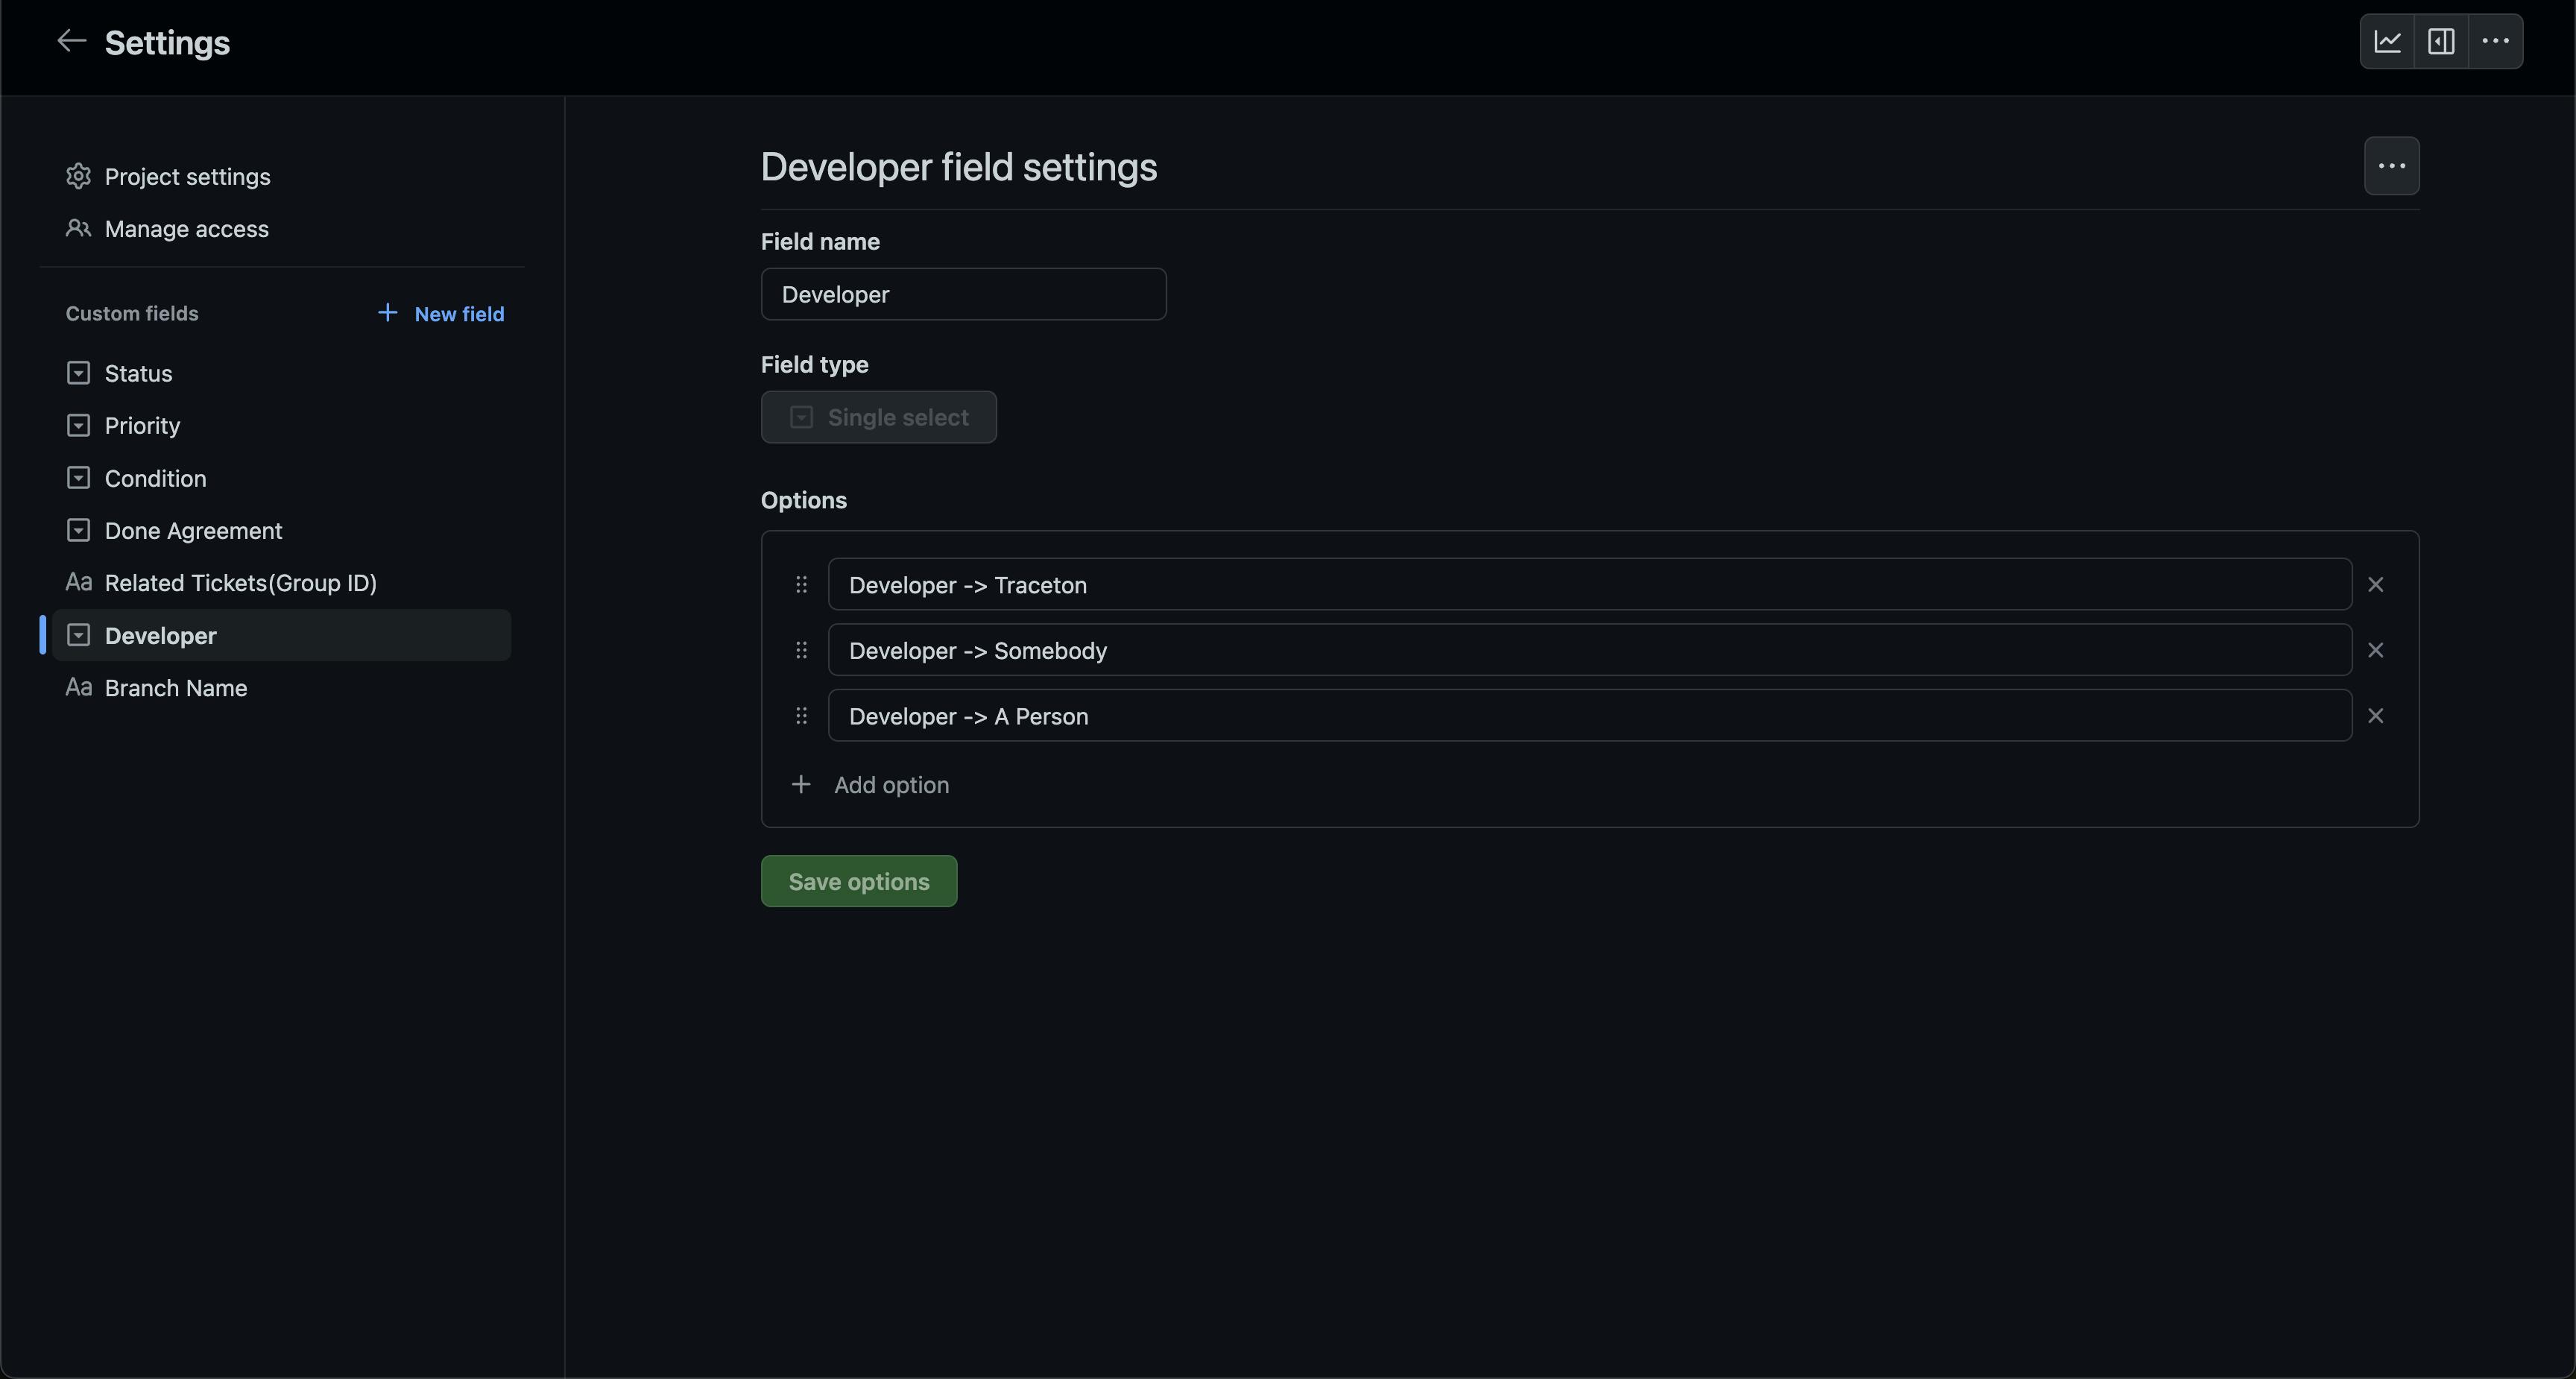
Developer.
The Developer property is a select field that is set when a developer pulls a ticket from the To Do column, which we'll discuss later. This is helpful for the rest of the team, especially when they have questions or more info for the developer who is working on the card.
We include the word Developer with the arrow to help with the way Github displays this info on the card, You'll see what I mean later.
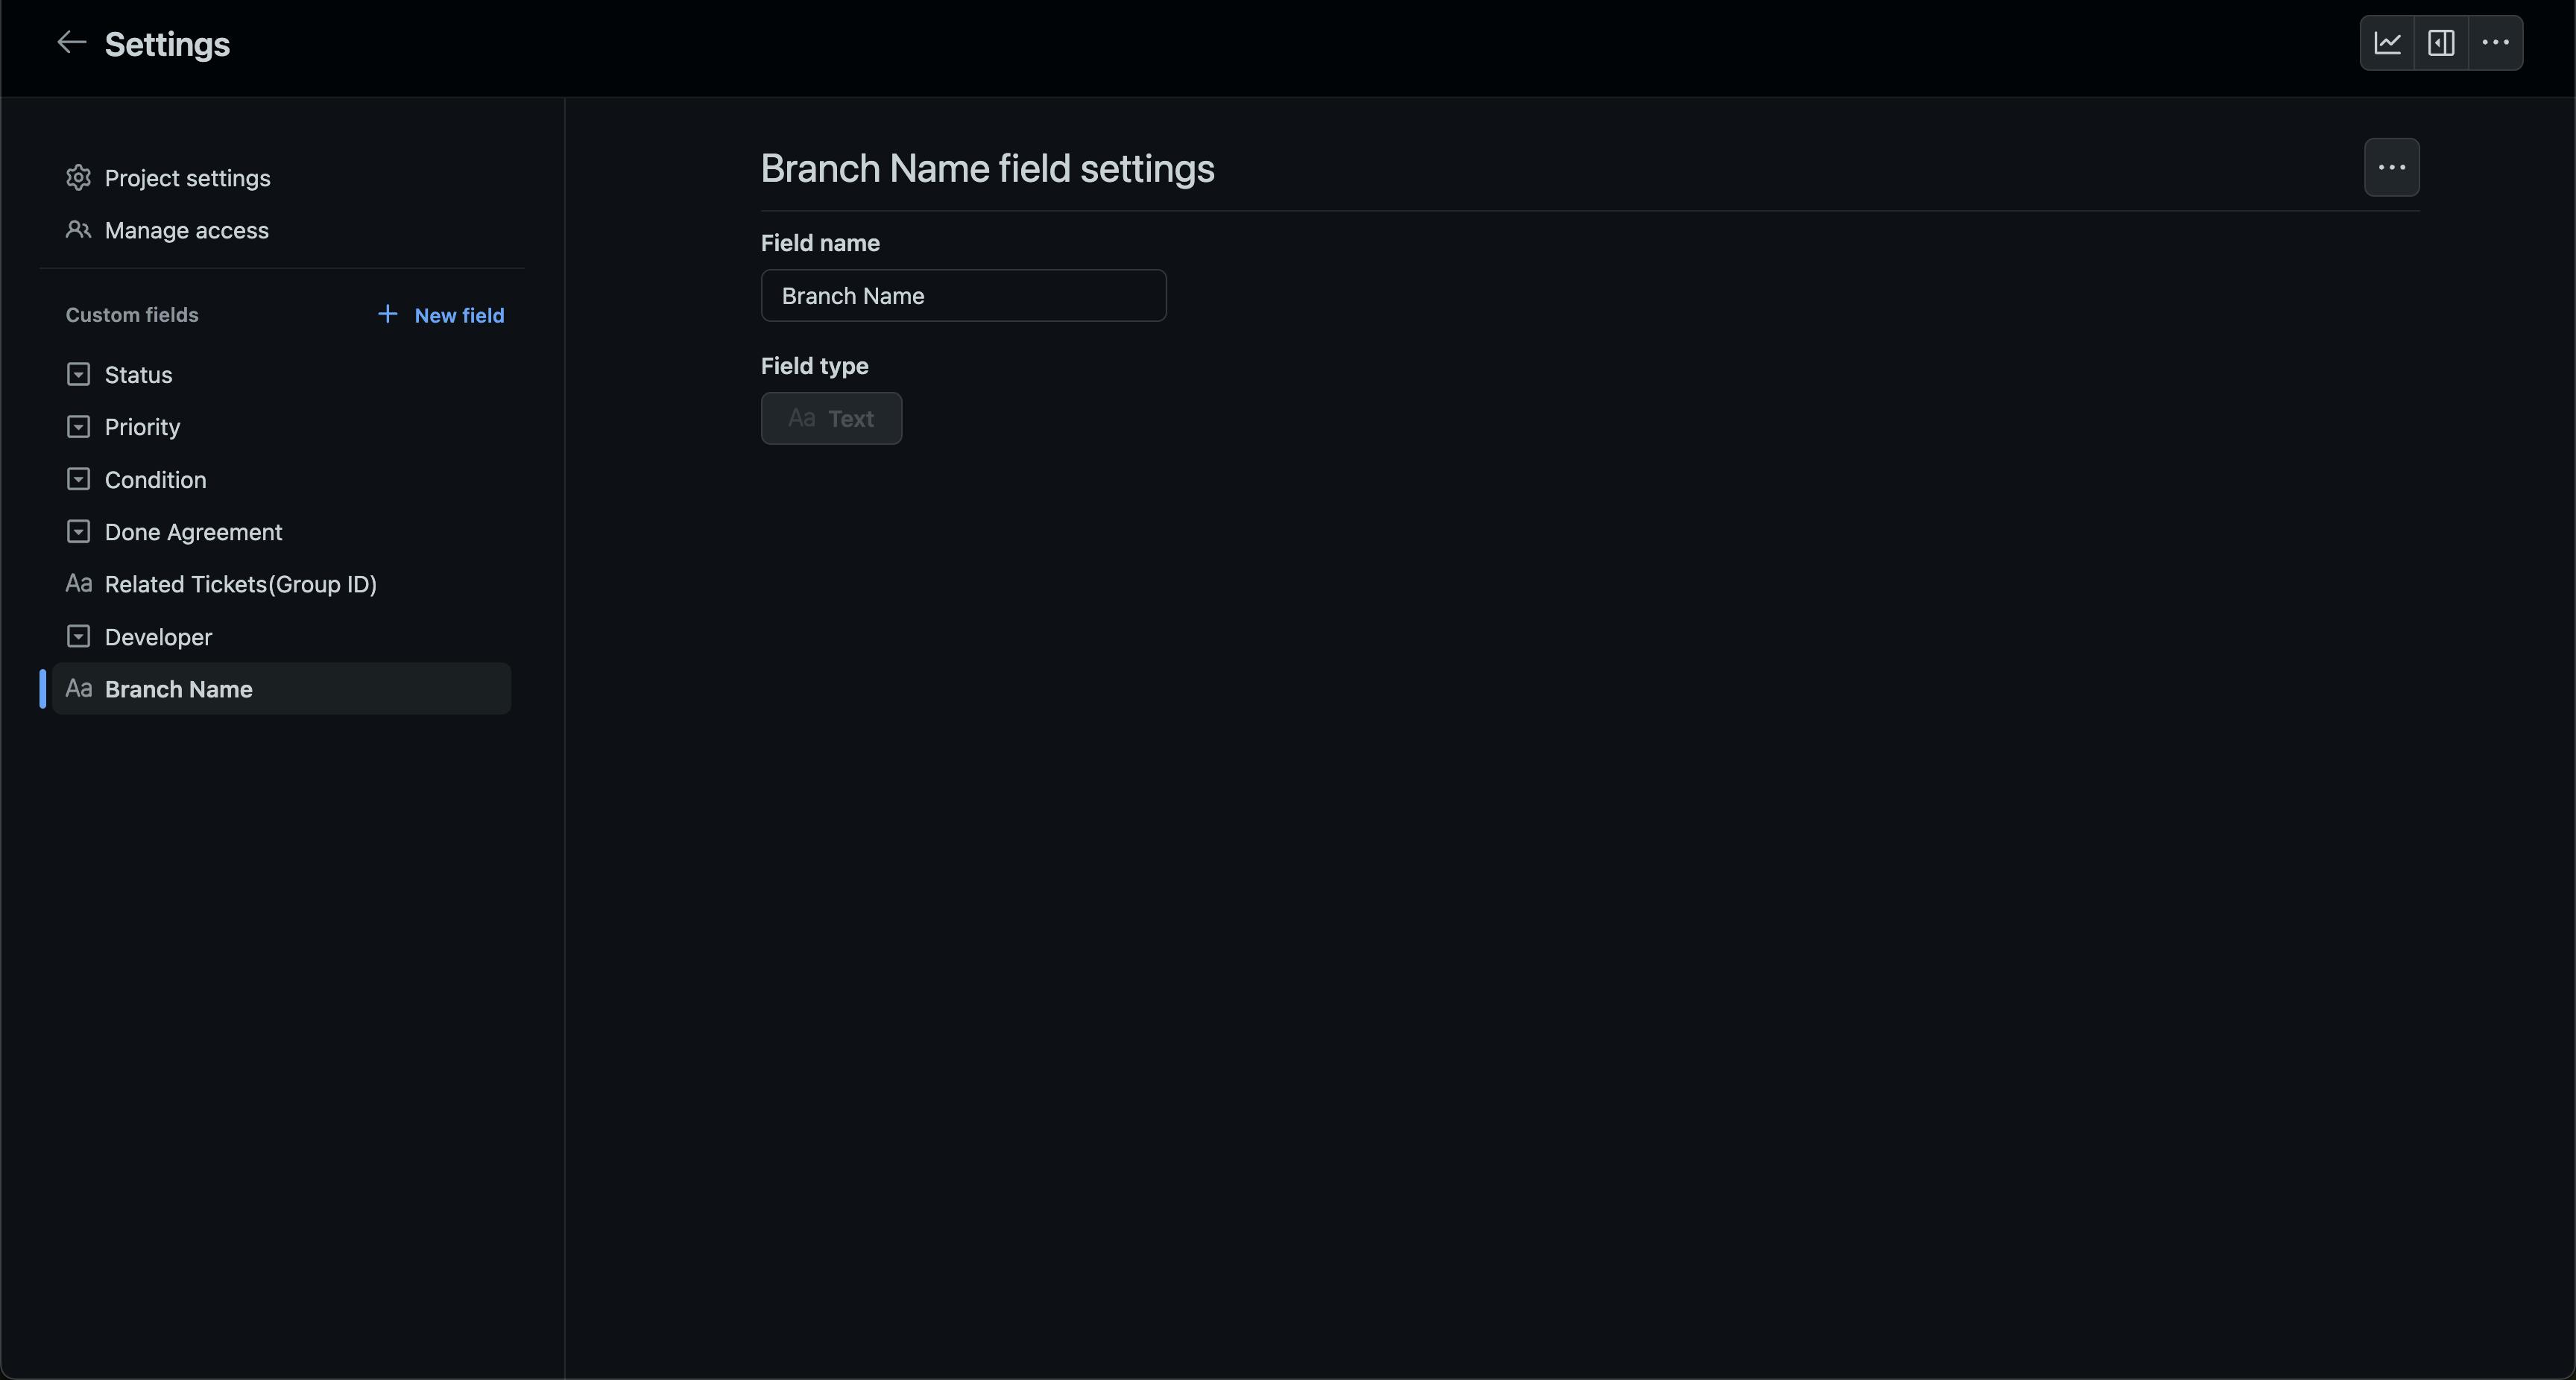
Branch Name.
Branch name is just that, The name of our feature branch that's associated with the card. We usually format our branches like this: DeveloperName-GithubIssueNumber-Date .
Setting up status columns.
One of the most important and difficult steps of our Kanban workflow will be deciding on our status columns. Remember, you can change things up. What works for my team might not work for you, and that's okay! You'll find the status property at the top of the properties we were just editing in the settings menu, We'll sort our columns by status.
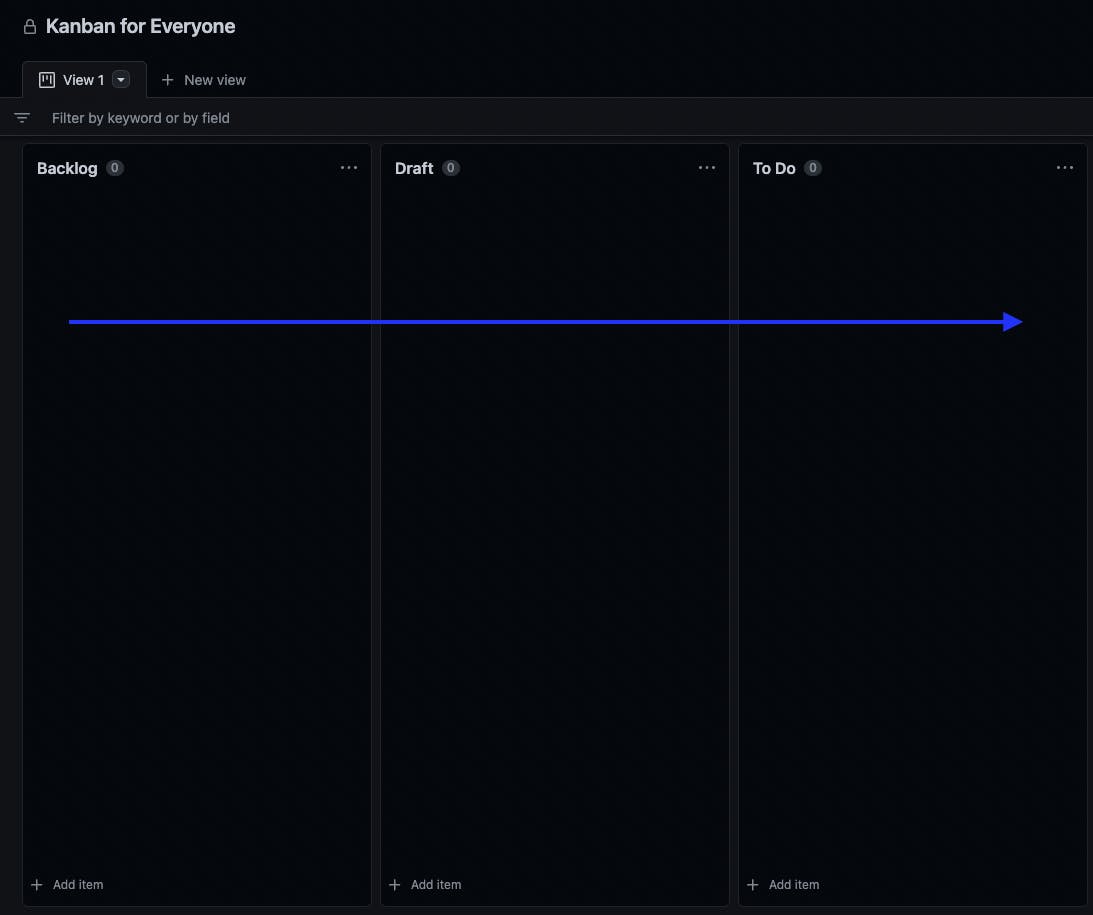
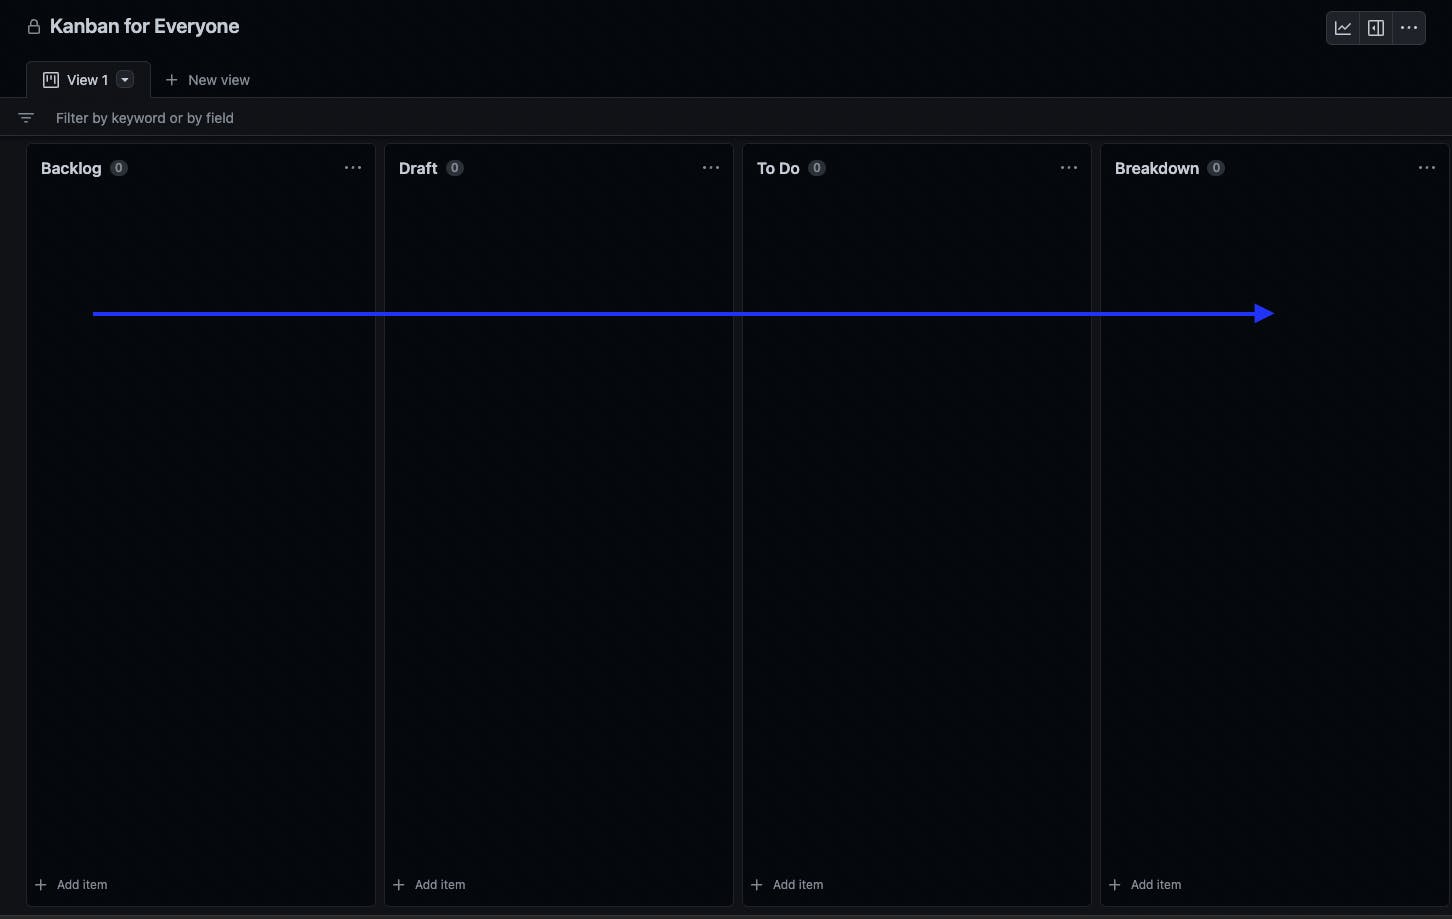
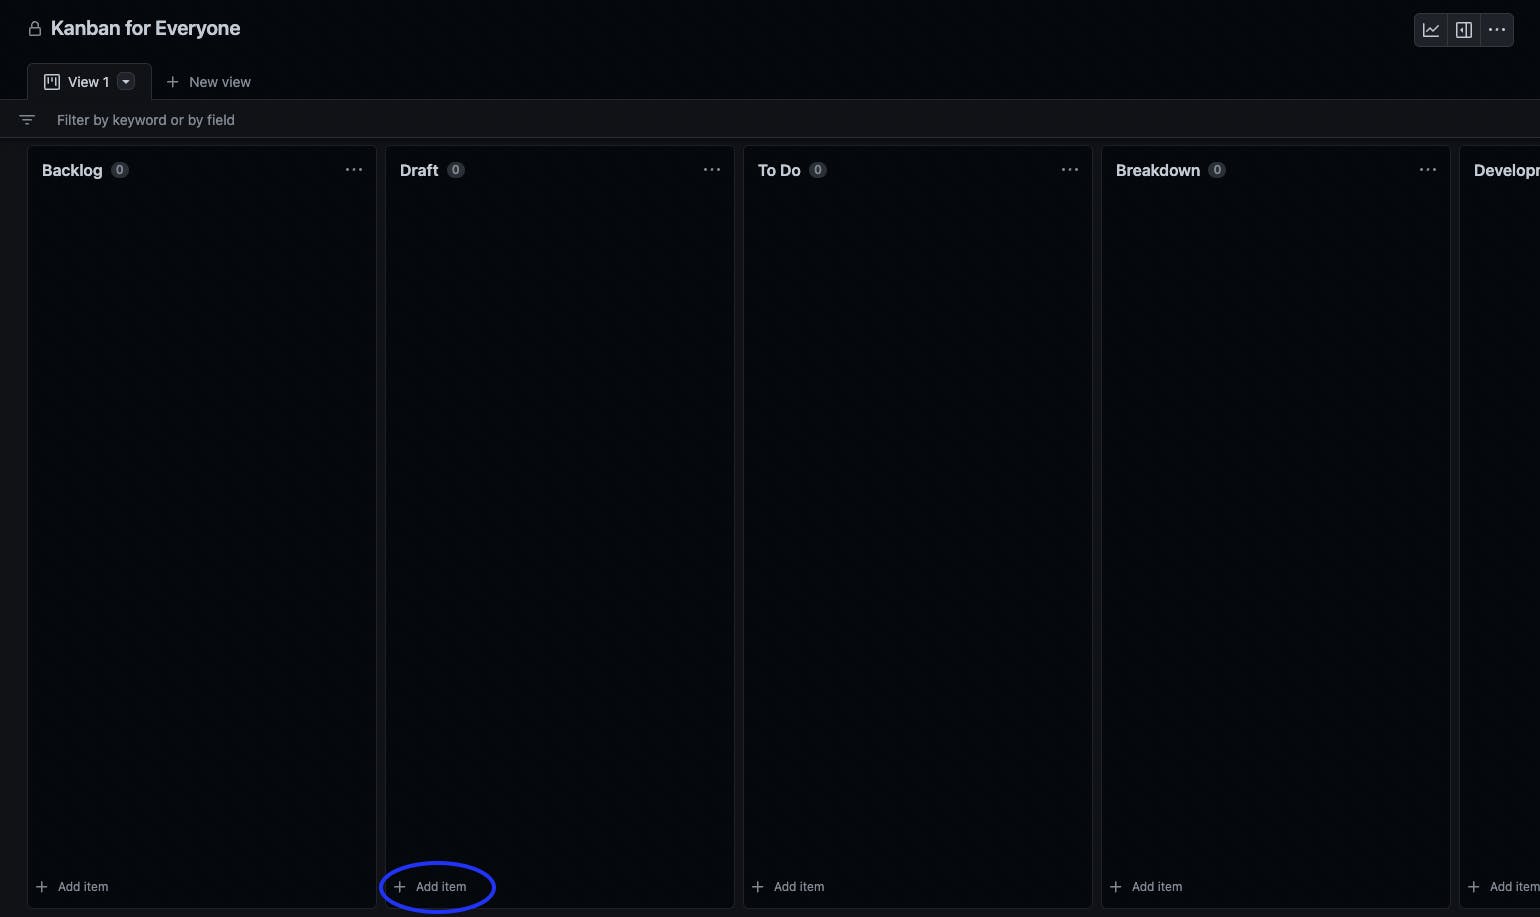
Backlog
Our first status column will be called Backlog. This is where cards will live if the team has decided not to work on them just yet. Sometimes we leave cards here until we can discuss them in our larger weekly meeting. This might be where you want to leave cards that have already been completed, and are waiting for some feedback from customers. Our team usually does this in the very last column, which you'll see in a moment.
Draft
Github has something called draft issues, which can only be created inside of a project. A draft issue won't show up inside of a repositories issues tab until it's converted into a regular issue. This is perfect in combination with our second status column.
Our Draft column will contain cards that are still being written, or are waiting for enough of the team to agree on the done agreement. Before a card can leave Draft, We want to make sure it has all the information needed for a developer to understand and complete the task with as little further input as possible.
To Do
Our next column is To Do, Anything in this column should be 100% ready for a developer to take and start working on. At this point in time, the card should still be a "draft issue" in Github, unless it was a "expedite/Emergency" Priority. Before entering To Do, a card should have At Least the following card properties set:
- Any priority
- Any condition
- Done agreement == Agreement Made
- Related tickets if any.
Breakdown
At this point in the cards flow, a developer has just grabbed a card out of the To Do column. When a card goes into Breakdown, The card will be split into smaller tasks if needed(large projects). Ideally a card will be broken into about 1-2 days of work each, But just find what works best for your team. Something to note is that Breakdown and all of the columns after it, have something called a WIP(Work In Progress) limit. This means that a column with a WIP limit of 4, can only have a total of 4 cards in it. We don't enforce that heavily, it's just what we like to see.
Notice that cards flow from left to right through the board, i'm not going to post any more pictures of the board for now.
Development
Development is pretty straightforward, Somebody is currently developing the implementation for this card. At this point the developer should assign themselves in the Developer card property. The developer should also enter the name of the branch they are using for testing and development in the Branch Name property. Development has a WIP limit of 4 for our team.
One last thing the developer should do before working on this card, is make sure they convert the "draft issue" into a real Github issue. The reason this is important is so that the developer is able to use the issue number/link when writing commit messages for this card. This will be important when code review is performed in the future.
Development Completed
Development completed, and most of the columns from here on out are pretty simple. Once a card reaches this column(moved here by the developer), All work has been completed. The developer believes their implementation accurately fulfills the requirements agreed upon in the done agreement. The developer should also have completed all of their own testing, including writing integration tests(Our testing framework simulates user clicks and behavior, it's all we really have time to write at the moment.).
Code Review
Usually with code review, whatever developer worked on the card won't be the one to perform the code review on that same card. Ideally the developer who implemented the fix should have performed their own code review before even considering the card completed anyways. Code Review has a WIP limit of 4 for our team.
The developer should have made a commit with the Github issue number that corresponds to the current card, included in the commit message. Don't worry to much about details, I'll show this later when we walk through a few cards. If the developer fails to link their changes in the commit, it's up to you if you want to ask them to find the exact commits for you. Depending on the card, I document the links were not properly made in a comment. Then either find the commits myself, or ask the developer to find them and document them.
Whoever performed the code review should leave their name on a comment in the card. Either saying the code review passed successfully, or that it failed code review and is being set back to To Do. If it failed, make sure to document why in the cards comments.
Code Review Completed
Once somebody has completed a successful code review, they will move it into Code Review Completed. Code Review Completed has a WIP limit of 4 for our team.
Round 1 Testing(Test Env, Feature Branch)
Our team uses Heroku for our hosting. Once code review has been completed, it's time put the feature branch into our test environment. We'll now perform manual and visual testing, ensuring all of the done agreement requirements were met accurately. Once Round 1 testing is successfully completed, document that in a comment on the card and move the card into the next column.
What happens when a card fails round 1 testing will depend on your team and preferences. It might also depend on the reason the card failed testing. If a coding change is needed, It should be documented and moved back into To Do. Round 1 Testing has a WIP limit of 4 for our team.
Round 1 Tests Passing(Test Env, Feature Branch)
Cards in this column are waiting to be merged into the main branch for the next stage of testing. This column has a WIP limit of 4 for our team.
Before we merge any changes into our main branch, we tag the current state of the main branch(the same version that's in production currently). This way if needed, we can always back out changes easily.
Round 2 Testing(Test Env, Main Branch)
Once the changes for a card have been merged in the main branch, the main branch should be put into our test environment. We'll make sure that all done requirements were met one last time before our changes go into production. We placed a WIP limit of 4 in this column.
Round 2 Tests Passing(Test Env, Main Branch)
Cards in this column are waiting to be merged into production for final validation and final testing in production if possible. This column has a WIP limit of 4 for our team.
Round 3 Testing/Validation(Production Env, Main Branch)
When a card reaches round 3 testing, A few things happen. We'll validate the change was correctly implemented in the production environment. If this card is the result of a customer submitting a ticket to our support team, this is the point in time we'll let them know the fix has been implemented and ask them for feedback. If everything looks good, we'll note that in a comment on the card, and set it to the next column.
Round 3 Testing/Validation Passing(Production Env, Main Branch)
Once a card reaches this column, we are pretty much done with it. We tend to leave cards in this column for a week after it was validated in production. We do this to wait for customer and internal feedback. If needed, we'll actually move a card back into Backlog to go over feedback in one of our meetings.
Using our Kanban board.
Now that our board and card properties are complete, let's work through an example card. We're going to go step by step, start to end. We're going to use one of my personal project repositories for our example.
A New Support Ticket
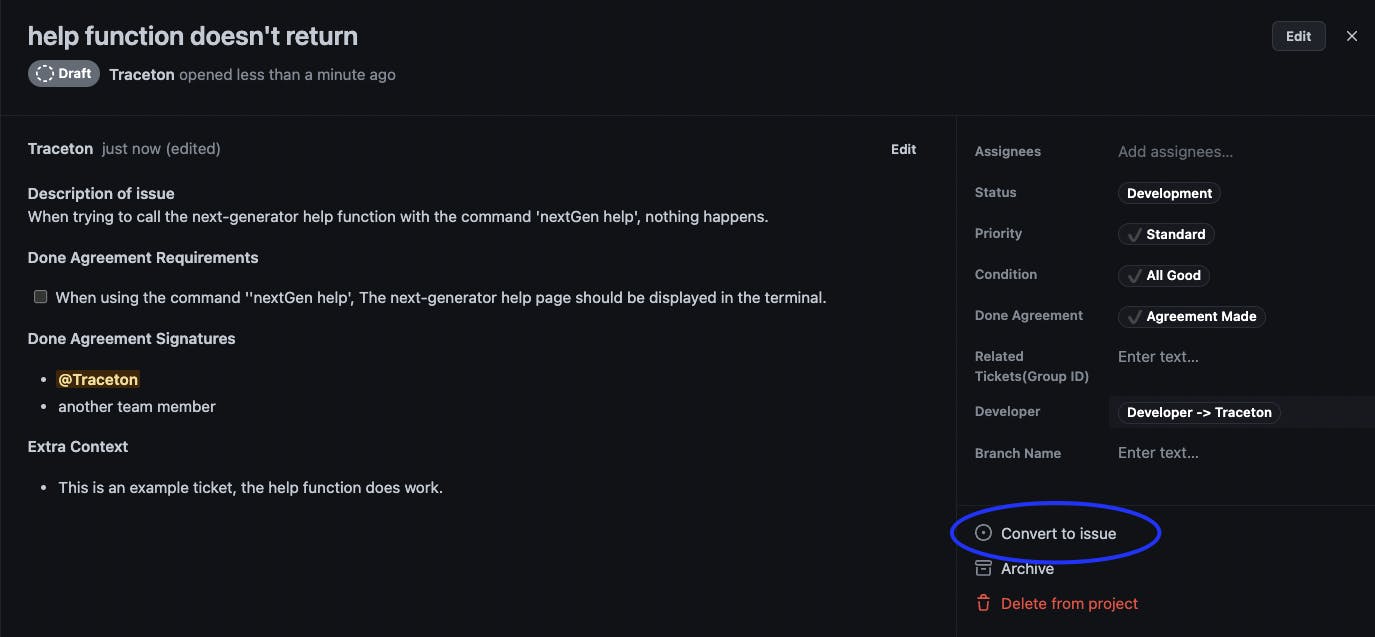
Let's pretend that we received a support ticket from a customer. The ticket contains the content: "The help function does nothing when trying to call it".
In our team, Typically I will read that support ticket, verify what the customer claims to have happening, Then enter it as a draft/issue in the Github project.
So let's start with that. First click on Add item under the Draft column.
Name this card "help function doesn't return". Now click on your new card. You should have a blank card with only the title and status set so far.
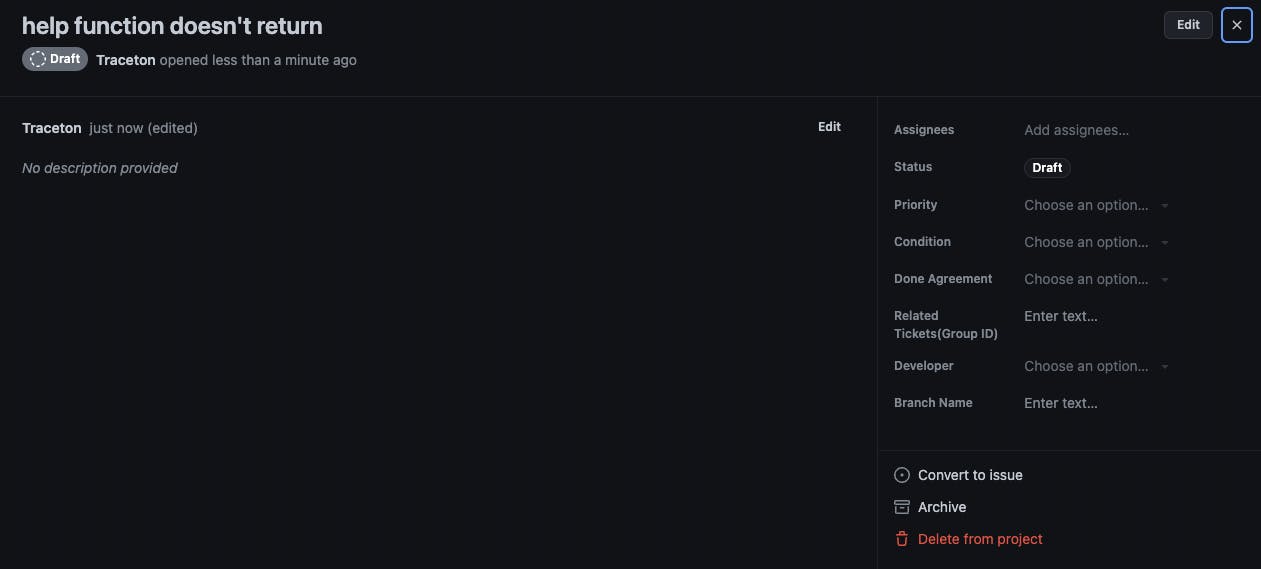
The first thing we'll do is set our card properties. Remember we need at least priority, condition, done agreement, and related tickets if any exist.
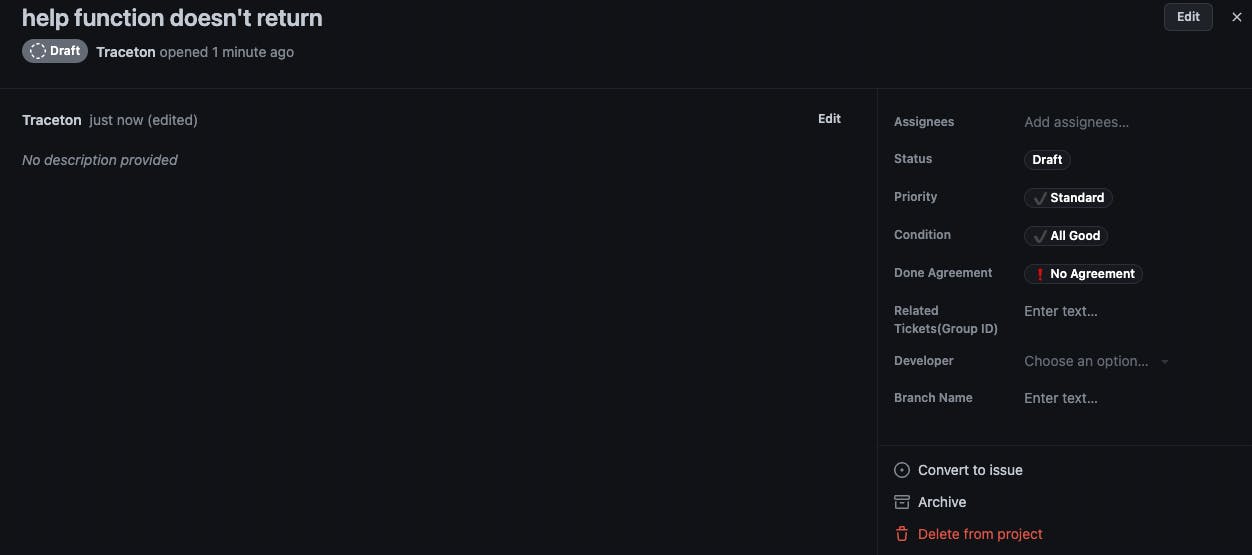
I'm setting the priority of this ticket to Standard. The Condition is All Good. The done agreement hasn't been written, so i'll set Done Agreement as No Agreement.
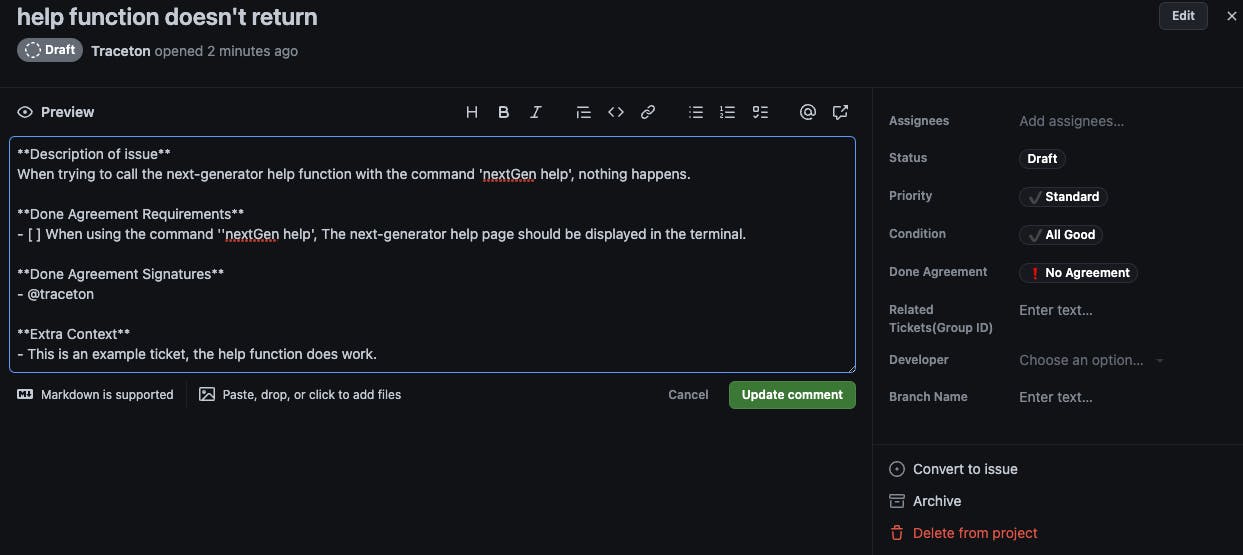
Next we'll create the body of our card. We've entered a description of the issue, The done agreement requirements, the done agreement signatures, and extra context. Usually I'll go ahead and re-create this issue in a test environment, and include any errors in this section also.
So at this point, we can change the Done Agreement property to Agreement Pending. This indicates to other team members that they can review the done agreement requirements of the ticket, and sign off if they agree the requirements are satisfactory. They sign off by editing the card and tagging themselves below the Done Agreement Signatures section.
Once the card has enough done agreement signatures, set the Done Agreement to Agreement Made. Now it's ready to be moved into the To Do column.
To Do column
Now that our card is in the To Do column, It's ready to be taken by a developer and worked on. At this point our card is still a draft issue and can't be seen inside of our repositories issues page. Usually we will leave the card as a draft issue and let the developer that takes the card convert it into a regular issue. However it the issue has a priority of Expedite/Emergency, We'll go ahead and convert it to a regular issue.
Breakdown column
For this example, I'll act as the developer on this card also. Let's say it's Monday morning and i'm ready to take on my next task. I see a card in the To Do column that looks like the perfect fit for my skills. It also happens to be the very top card in the stack(and only), So this is definitely what I should be working on.
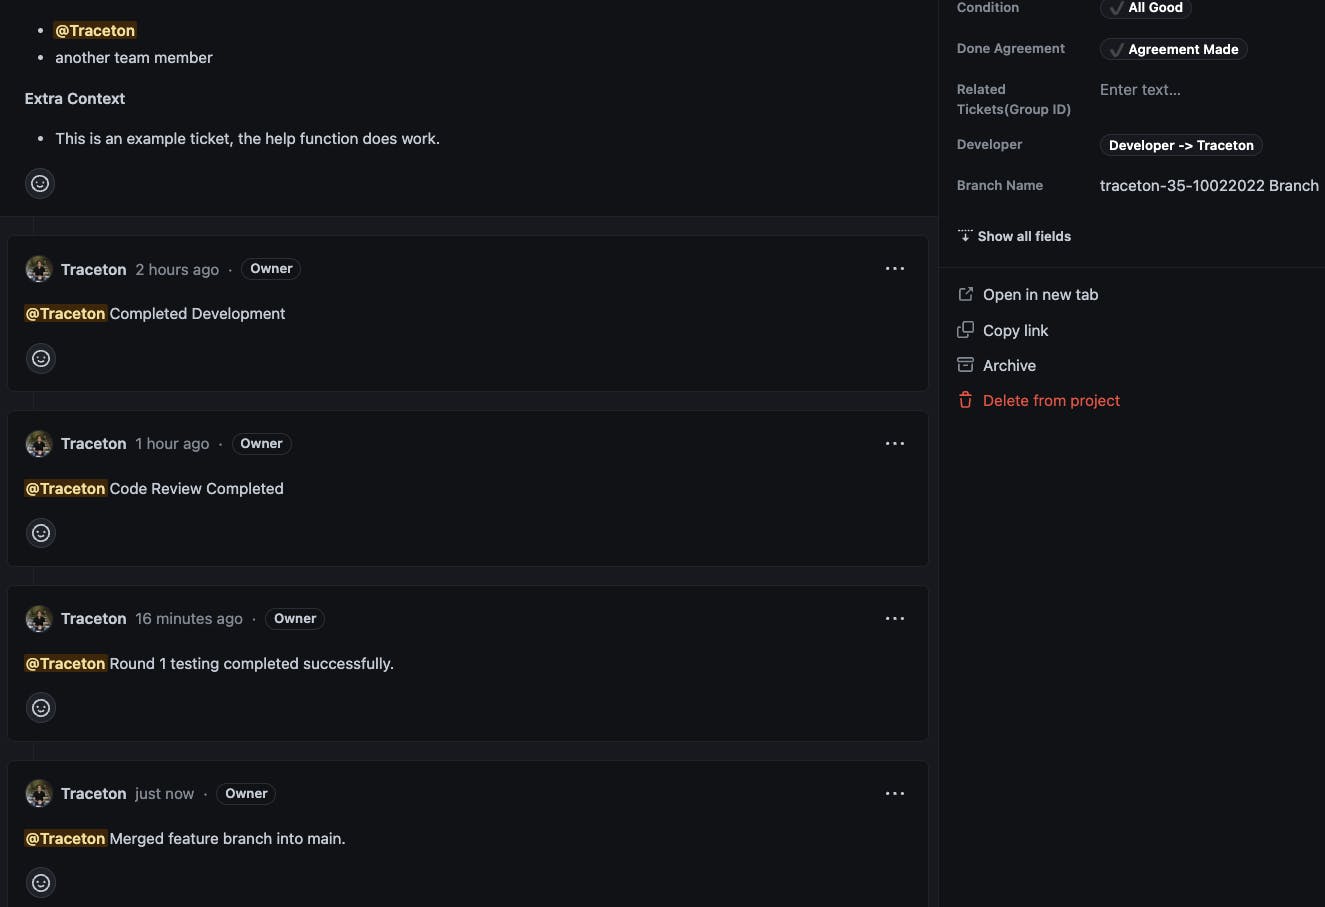
First I'm going to set the Developer card property to "Developer -> Traceton", to show everyone else i'm actively working on this ticket. Then i'll move it in the Breakdown column. Looking at this ticket, it doesn't need to be broken down into multiple tasks, so there's no need to keep it in the Breakdown column. Next it goes to the Development column.
If this ticket had multiple tasks, or maybe included 2 separate features that were somehow connected. This is where i would split it into multiple cards, and assign a Related Tickets(Group ID) value for both cards. If the Done Agreement Requirements have changed at all, I would now move both cards back into the Draft column and set the Done Agreement property to Agreement Pending for both. I would then move these cards through the board as normal, With the caveat that I would count these cards as 1 when looking at the WIP limit.
Development Column
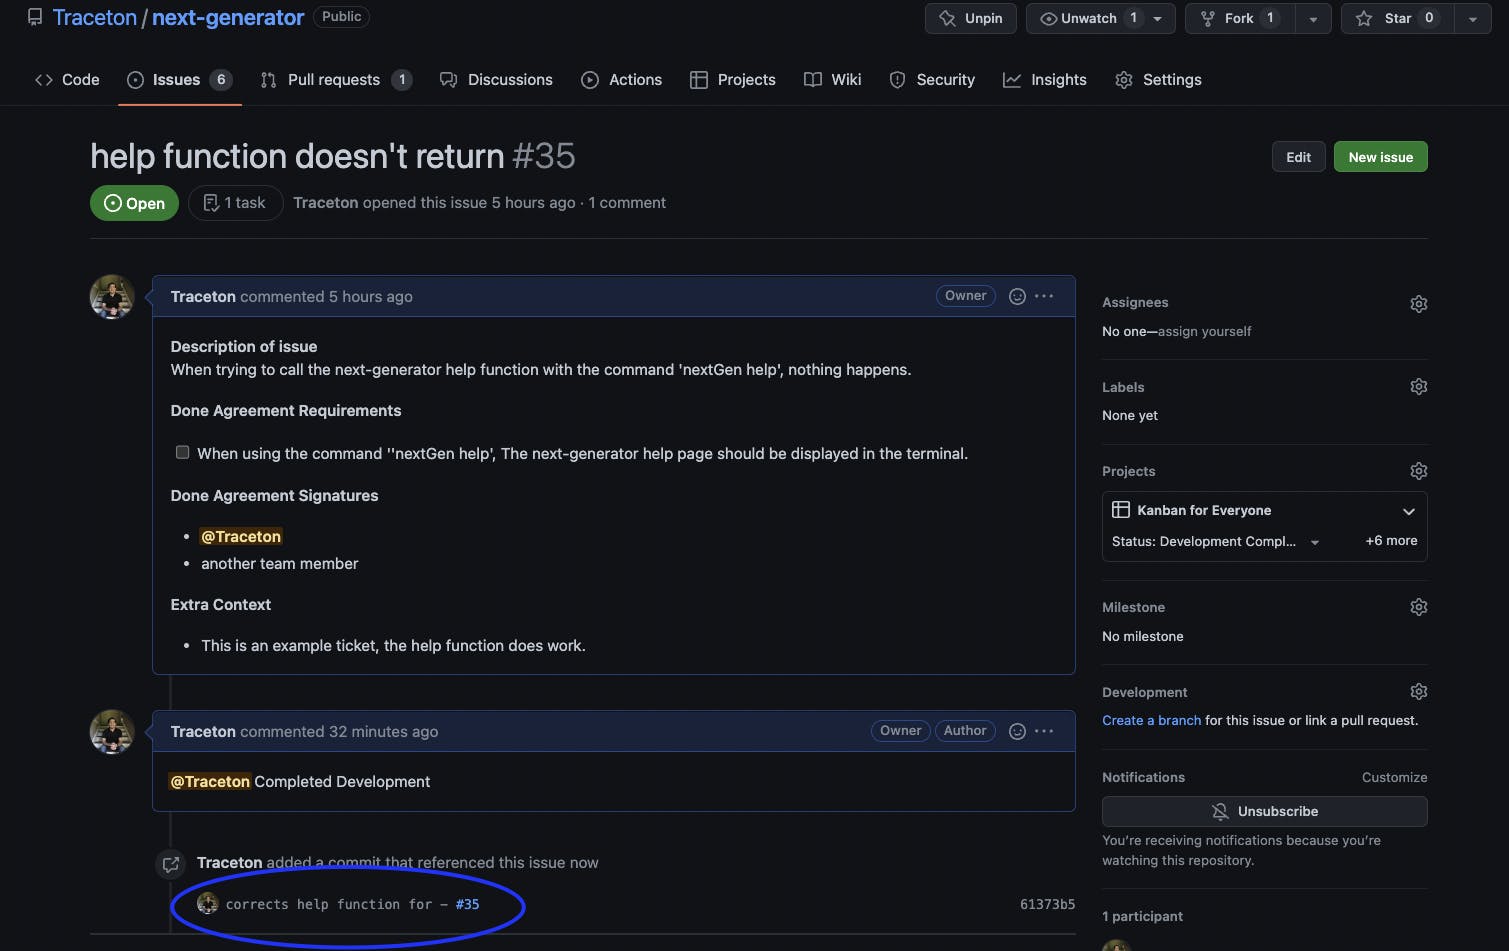
The first thing i'll always make sure to do before starting work on a new card, Is make sure it has been converted into a Github issue. This will allow it to be seen on the repositories Issues tab.
At this point i'll start working on the issue. Verifying the problem for myself, re-creating it in my local env, finding the cause, and working on a solution.
First we'll create a new branch. Using a format like this: DeveloperName-GithubIssueNumber-Date . Which would be traceton-35-10022022 in this scenario. Make sure to enter this in the Branch Name property of the card. I missed this in the example here
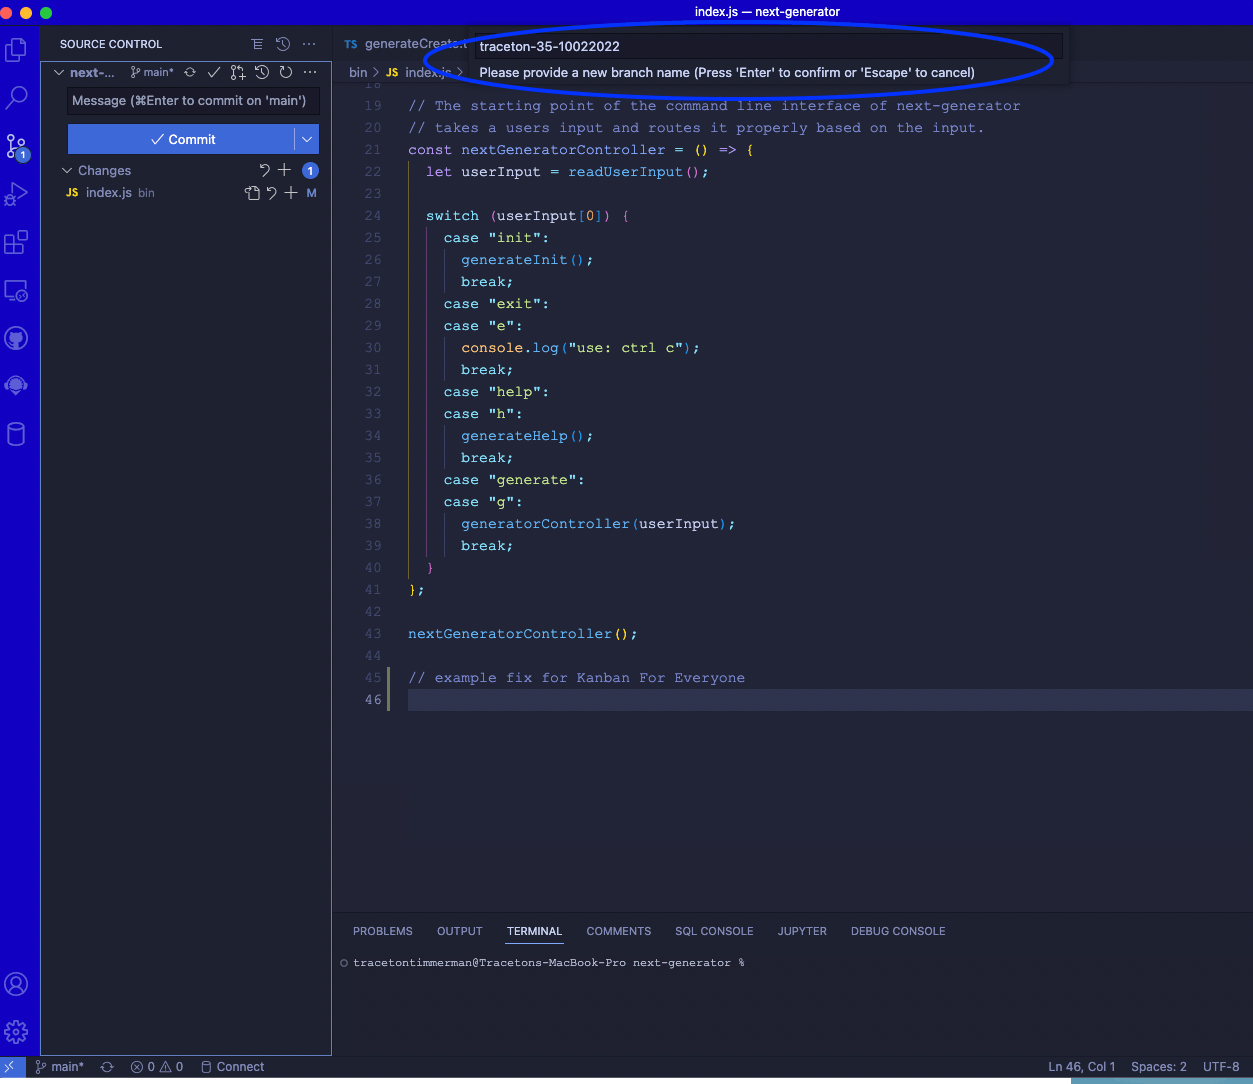
For this example i'll just be entering a comment as the fix. It's really important that when I write my commit message, I include the link to the Github issue. I'm using VS Code to interface with Github in the example below.
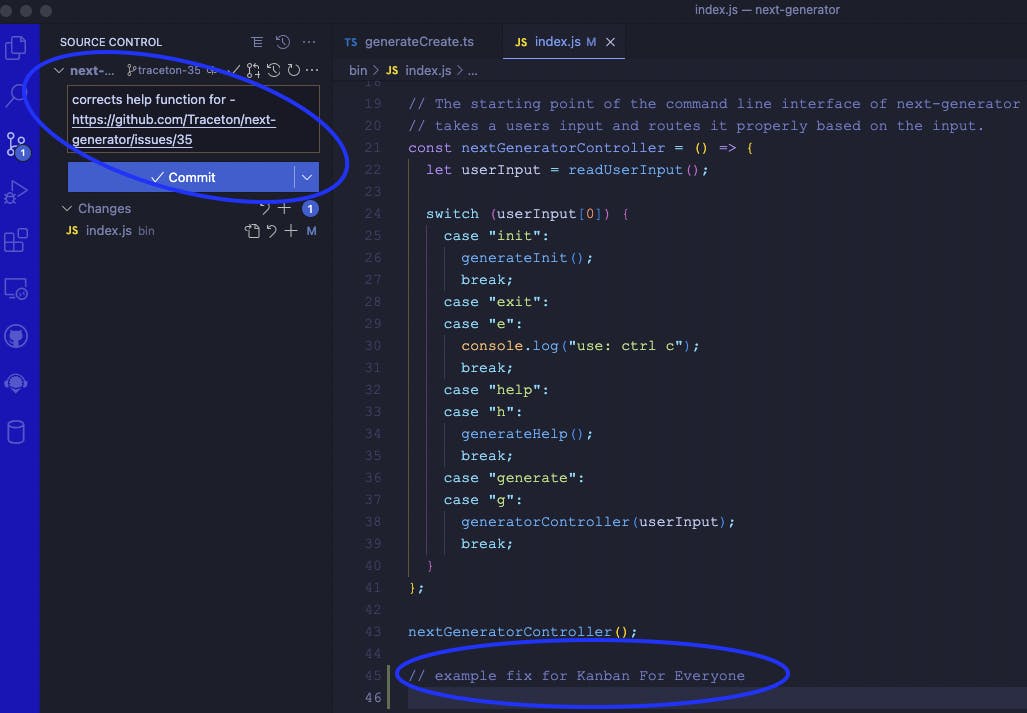
At this point I should have already reviewed my own changes and written any tests, I should believe this code is ready for production. When i'm done with development, I'll publish the branch, Move the card into the Development Completed Column, and write a short message stating that I am finished working on this card.
Development Completed Column
There's not much going on for cards in this column, basically they are just here until somebody is ready to perform code review on them.
Code Review Column
When our team performs code review, We prefer the person reviewing to be a different person than who originally worked on the card. For this example I'll be the one reviewing the code changes. To do this i'll open up the card, and click on my linked commit.
This will take me to the commit, Where i can review and comment on the changes. If everything looks good, i'll leave a comment on the commit and inside of the card comments.
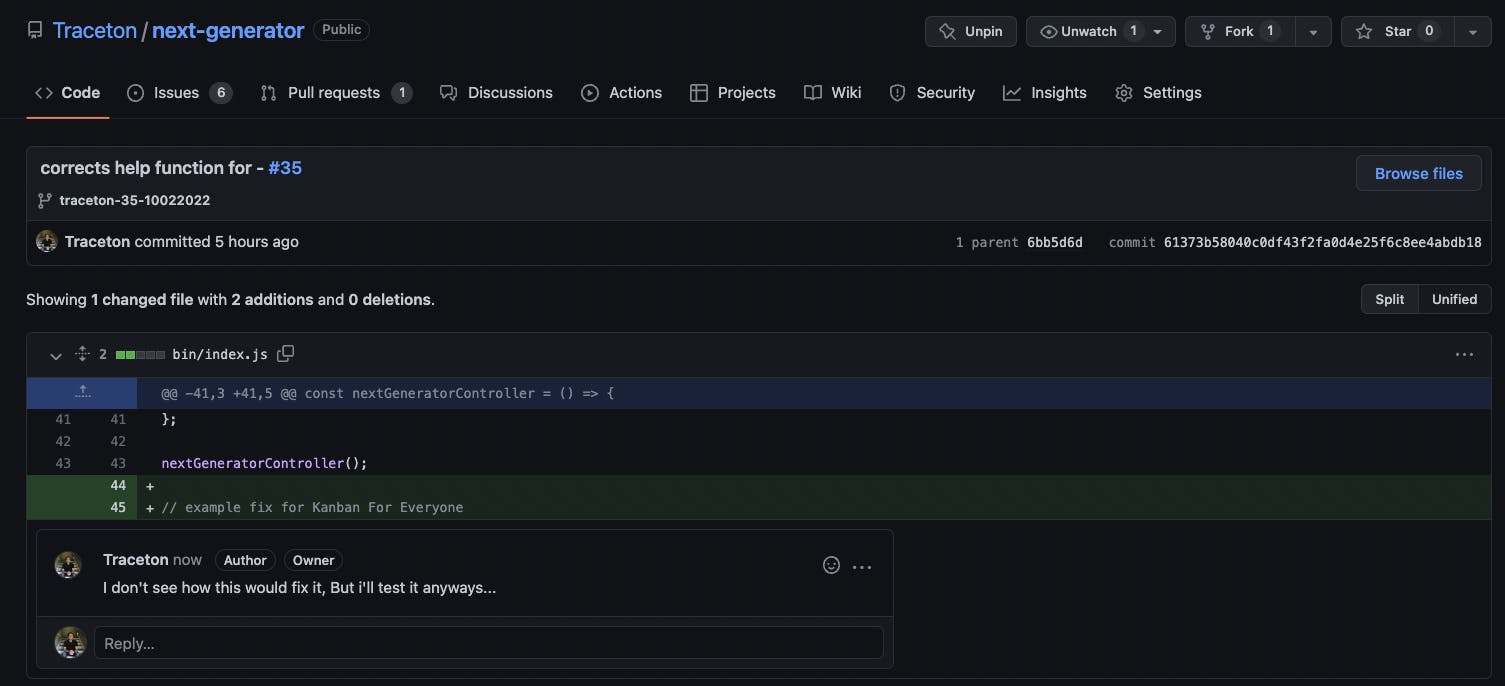

We do a few things when code review doesn't go as planned. Depending on the issue, we'll either set the card back to the To Do column or just leave a comment tagging the developer with a question etc. But for now we'll move this card along to the Code Review Completed column.
Code Review Completed Column
Nothing going on here, Cards in this column have passed code review and are waiting for Round 1 Testing.
Round 1 Testing (Test Env, Feature Branch)
Cards in this column are being tested in our test environment, with a deployment of the feature branch for that card. This is also a chance to showcase any features or improvements to the rest of our team since they all have easy access to this env, and test data isn't protected here. If everything looks good, we'll go ahead and move the card to Round 1 Tests Passing. Again making sure the Done Agreement Requirements were all met before doing so. I'll also leave a comment on the card comments saying that I completed Round 1 testing.
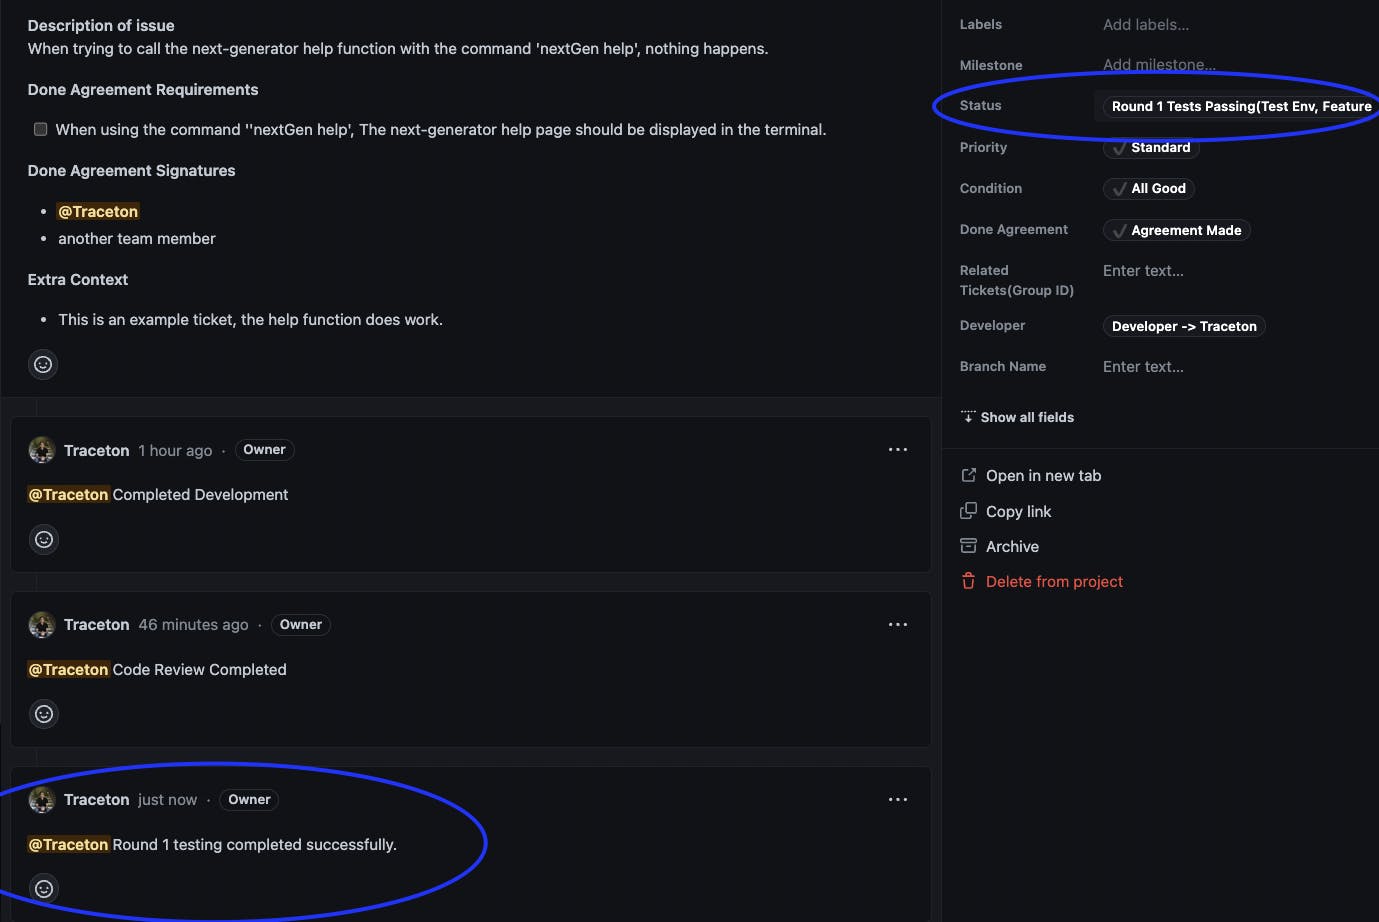
Round 1 Tests Passing (Test Env, Feature Branch)
This column has a little more going on than most of these secondary columns. At this point we should be pretty confident in the changes of this card.
The next step is to test our changes in the test env again, but on the main branch. But before we can do that, we need to create a pull request and merge our feature branch.
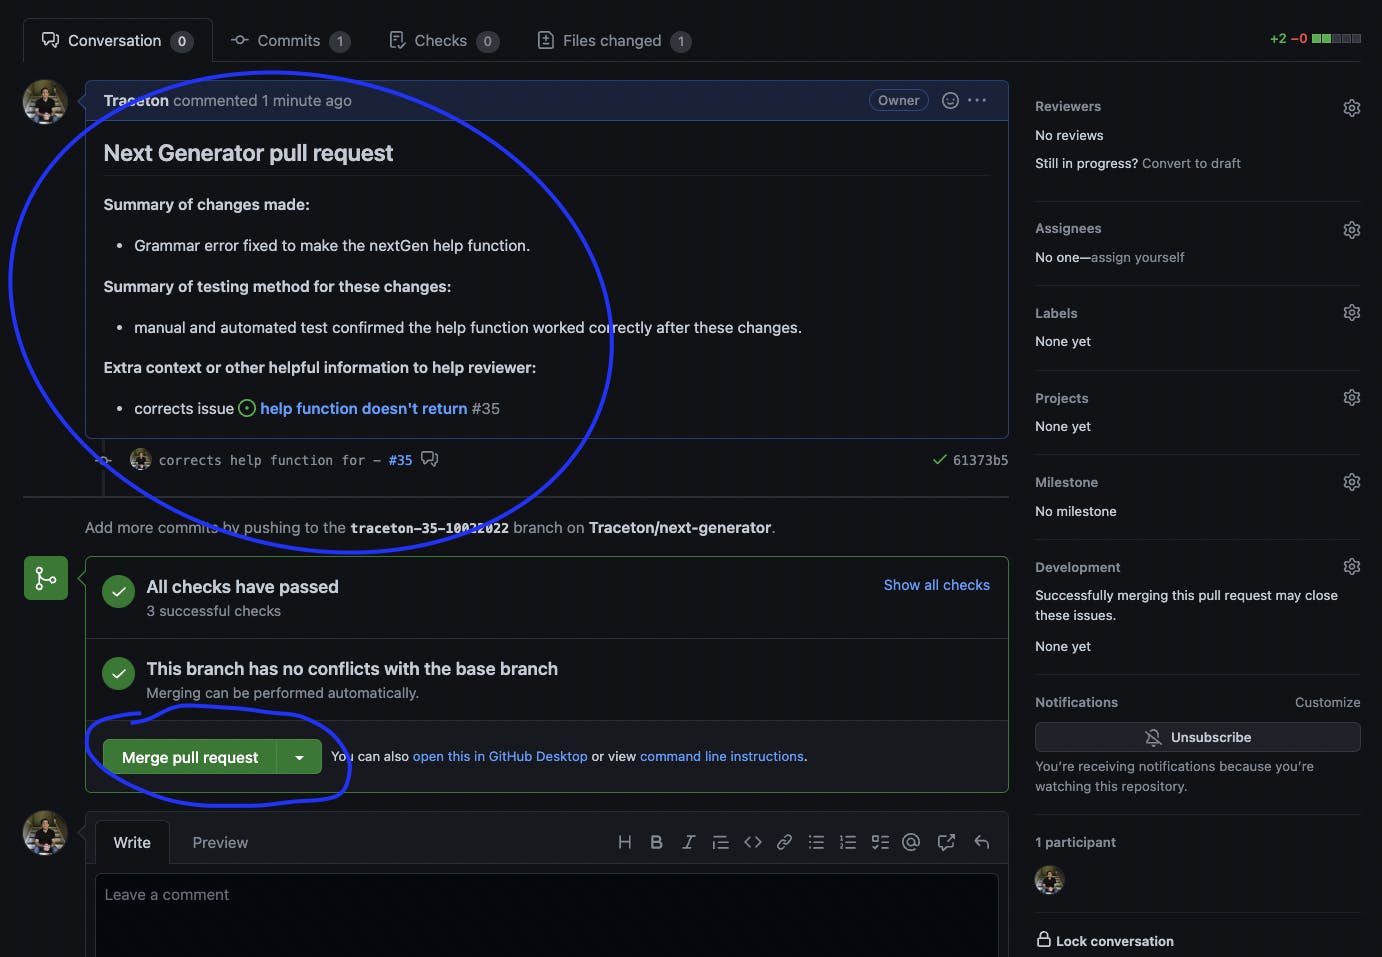
Once I've merged the feature branch into main, I'll make sure to leave a comment on the card itself explicitly stating this has been completed.
At this point, If i have a few more cards to code review and test at that time, I'll go ahead and complete the same process for all of those. That way I can merge everything into main, and complete Round 2 Testing with all of the changes included. This gives me the most realistic picture of what will be deployed to production, Which is exactly what I want when testing.
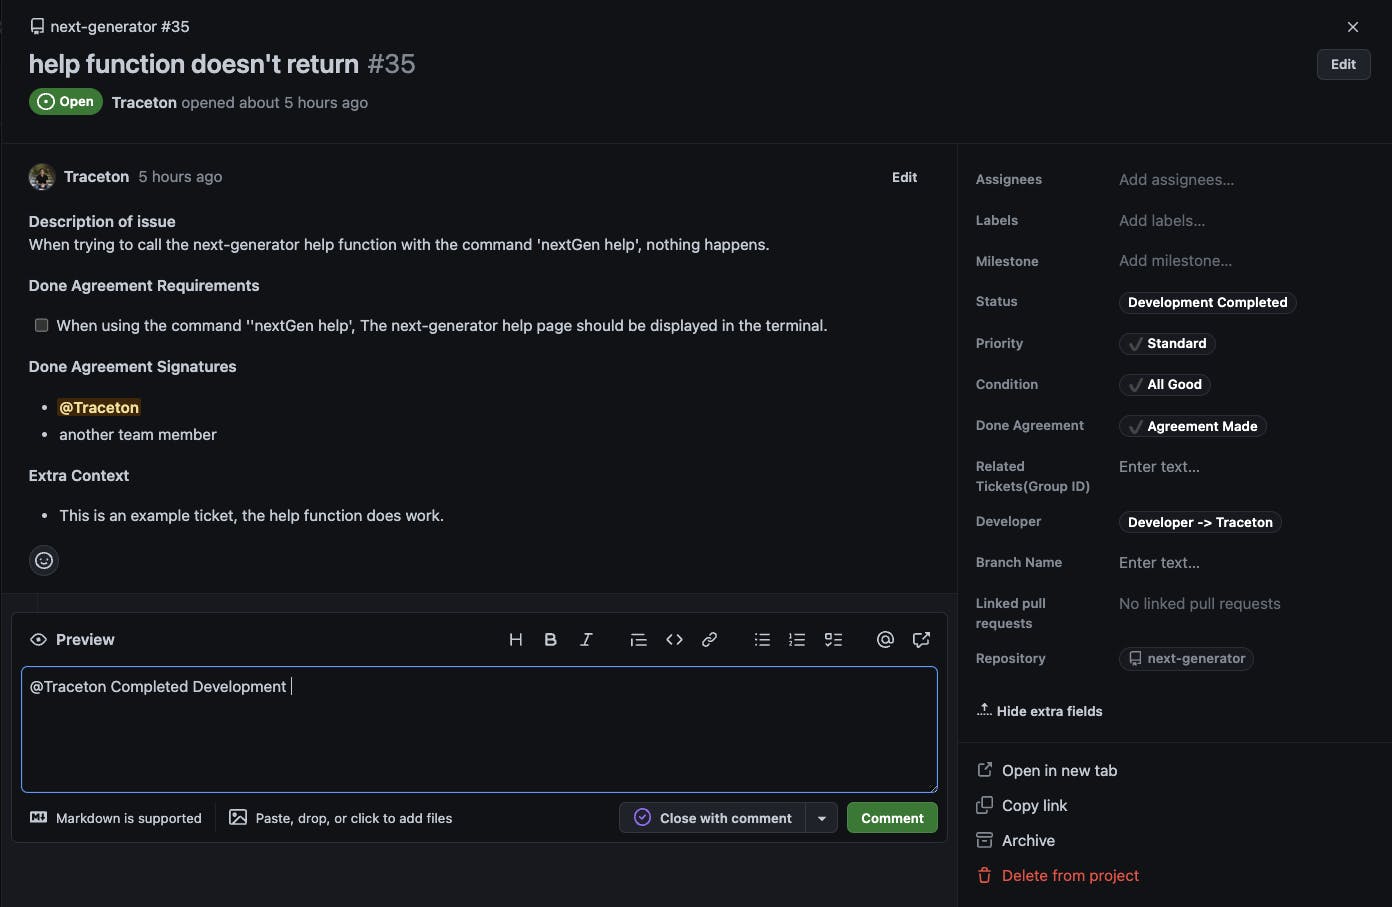
You've probably noticed I update the card with comments a lot. I do this for two reasons. The first reason I do this is so everyone looking at the card has a very clear understanding of the history of the card. Second is that when you view a card in the project view, It's missing some of the links that are shown when you look at the card/ticket in the repositories issues tab.
Project View
Repositories Issues Tab View. Imagine the project view without those extra comments, It would have no easy to view history.

Round 2 Testing
At this point I might have a few recent cards merged into the main branch that might not be in the production build yet. So i'll go ahead and deploy the main branch on our Test environment for one last round of testing before our changes hit production. Now we'll perform the same tests that we did in Round 1 Testing, and move the card forward to Round 2 Tests Passing if things look good. Again making sure the Done Agreement Requirements were all met.
Whenever a card has an issue at this stage things can get challenging. It's much more unlikely that we find issues at this stage, but it does happen. If I find an issue at this stage of testing, I'll message the developer directly and set the cards Condition property to Needs Discussion. Most of the time in this scenario the developer would just work on fixing this change in the main branch. We'll probably work on a better solution for this as our team grows. But this works for us and our project for now.
Round 2 Tests Passing (Test Env, Main Branch)
Cards in this column are ready to go into production. We don't have a certain day that we deploy to production. We just see what cards have been merged into main and decide on what we think is best for us and our customers.
Round 3 Testing/Validation (Production Env, Main Branch)
This is the good part, Well hopefully. At this point we test that our changes are working correctly in the production environment to the best of our ability. Again making sure the Done Agreement Requirements were all met.
In this example, we received a support ticket which resulted in a card being created. Now is the time we let the customer know that the fix for their issue has been implemented. Hopefully we'll receive confirmation that this solved their issue along with any feedback they might have.
If we are happy with the outcome, and we believe that every Done Agreement Requirement was met. It's time to move the card into the Round 3 Testing/Validation Passing Column. Depending on customer response and feedback, we'll leave a card here for about a week.
Conclusion
That was a lot of Kanban. I just want to say one more time, This is not a rulebook. Use this info however you want, Even if you read this and thought of many ways you could do better. I hope I was able to give you some inspiration for a more organized workflow. Kanban will slow you down. But for our team the time lost in process was greatly made up by clear outcomes, better communication across time zones, and better documentation of our software and the ideas around it.